
The ideal mousse stabilizer isn’t about gelatin versus egg whites; it’s a strategic choice in molecular architecture to achieve a specific textural goal.
- Egg whites create a delicate, fine-bubbled foam through protein denaturation, but this structure is highly vulnerable to fat and lacks long-term stability.
- Gelatin builds a robust, thermo-reversible collagen network, resulting in a more durable foam with a richer mouthfeel, ideal for slicing and piping.
Recommendation: Select egg whites for immediate service and a cloud-like, ephemeral lightness. Choose gelatin when structural integrity, make-ahead capability, and a richer texture are the priority.
For any dessert maker, the quest for the perfect mousse is a quest for controlled airiness. The debate often simplifies to a choice between two foundational stabilizers: gelatin and egg whites. This is commonly framed as a battle between modern and traditional techniques. Gelatin is seen as the reliable, if somewhat dense, workhorse for modern entremets, while egg whites are the purist’s choice for a classic, ethereal chocolate mousse. This perspective, however, misses the fundamental point.
The decision is not a matter of style but of science. It’s about choosing the right tool to build a specific molecular architecture. Do you want a tight, resilient network of bubbles that can withstand being sliced and frozen, or a fragile, cloud-like matrix that dissolves instantly on the palate? Each stabilizer constructs a completely different type of foam, with distinct properties of stability, mouthfeel, and resistance to collapse.
Understanding the “why” behind each method moves you from a cook following a recipe to an architect designing a texture. Instead of asking “which is better?”, the right question is “which bubble matrix will deliver the exact sensory experience I want to create?”. This guide will deconstruct the structural properties of each stabilizer, providing an analytical framework to make a deliberate, informed choice every single time.
This article will dissect the critical technical aspects that determine the success or failure of your mousse. We will explore everything from the molecular interactions of fats and proteins to the crucial role of temperature control, providing a complete structural understanding of this classic dessert.
Summary: Gelatin vs Egg Whites: A Structural Analysis of Mousse
- Why Fat Kills Egg White Foam Instantly?
- How to Fold Chocolate into Cream Without Losing Volume?
- 35% vs 40% Cream: Which Whipped Cream Holds Longer?
- The Temperature Mistake That Causes Chocolate Chips in Mousse
- When is Mousse Ready: The “Wiggle Test” for Doneness
- Why Low-Fat Cream Fails to Hold Air When Frozen?
- Why Nitrogen Bubbles Are Smaller and Smoother Than Soda?
- Why Your Mirror Glaze Is Dull and How to Get That Shine?
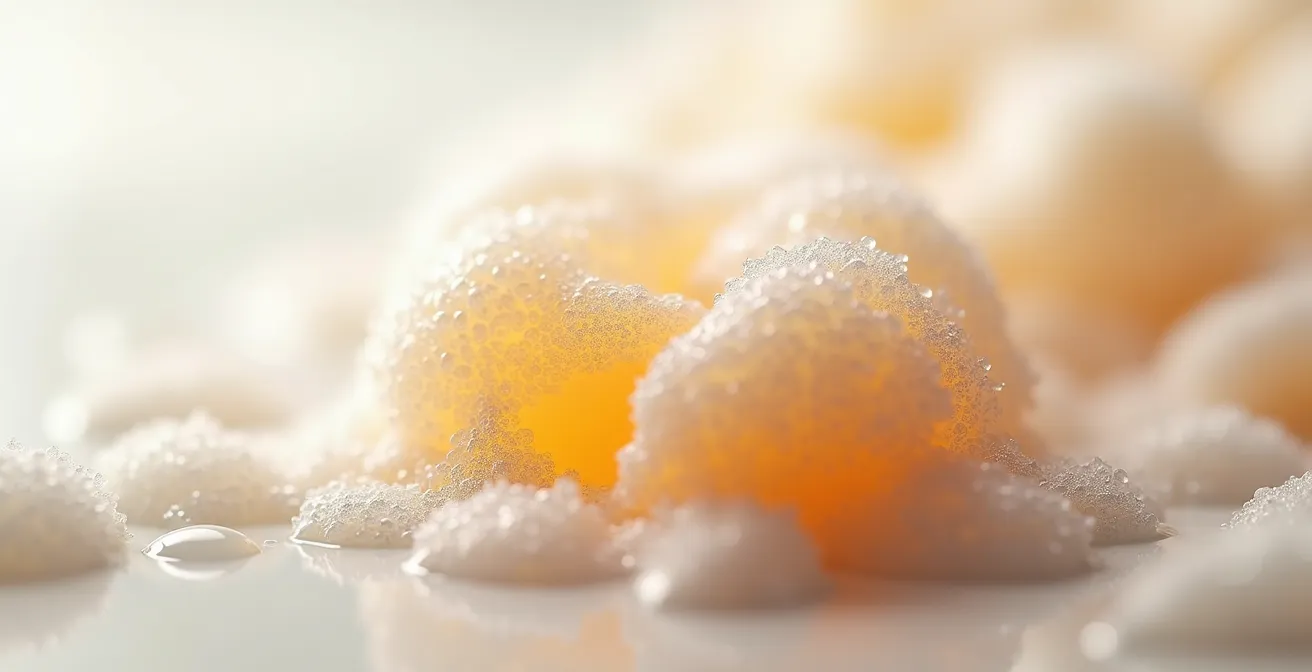
Why Fat Kills Egg White Foam Instantly?
The primary reason an egg white foam collapses in the presence of fat is a matter of molecular competition. An egg white foam is a delicate structure built from denatured proteins. When you whip egg whites, you are mechanically unfolding protein strands (like albumin). These unfolded proteins link together, creating a flexible mesh that traps air bubbles. This protein network is what gives the foam its volume and structure. However, these proteins have a greater affinity for fat molecules than they do for each other or for the air.
When even a trace of fat—from a greasy bowl or a speck of yolk—is introduced, it acts as a disruptive agent. The fat molecules wedge themselves between the linked proteins, breaking the bonds and causing the entire network to deflate. It’s a structural failure at the molecular level. To build a stable foam, the environment must be impeccably clean. Acid, such as cream of tartar, can help by making the proteins bond more effectively, increasing the foam’s resilience. In fact, stability tests have shown that an unstabilized foam can lose 23 mL of liquid in 60 minutes, compared to just 10 mL for one stabilized with cream of tartar. This demonstrates how a small chemical adjustment can significantly reinforce the protein architecture.
Ultimately, a successful egg white foam is not just about whipping air in; it’s about creating an uncontaminated environment where the protein matrix can form and hold without interference.
How to Fold Chocolate into Cream Without Losing Volume?
Incorporating a dense, fatty ingredient like melted chocolate into a light, airy base like whipped cream is the most critical moment in mousse making. Doing it incorrectly can deflate hours of careful work in seconds. The secret lies in a combination of temperature control and a specific folding technique known as the “sacrificial method.” First, you must manage the temperature differential. If the chocolate is too hot, it will melt the fat in the cream, collapsing the bubble structure. If it’s too cold, it will seize into hard flecks upon contact with the cold cream.
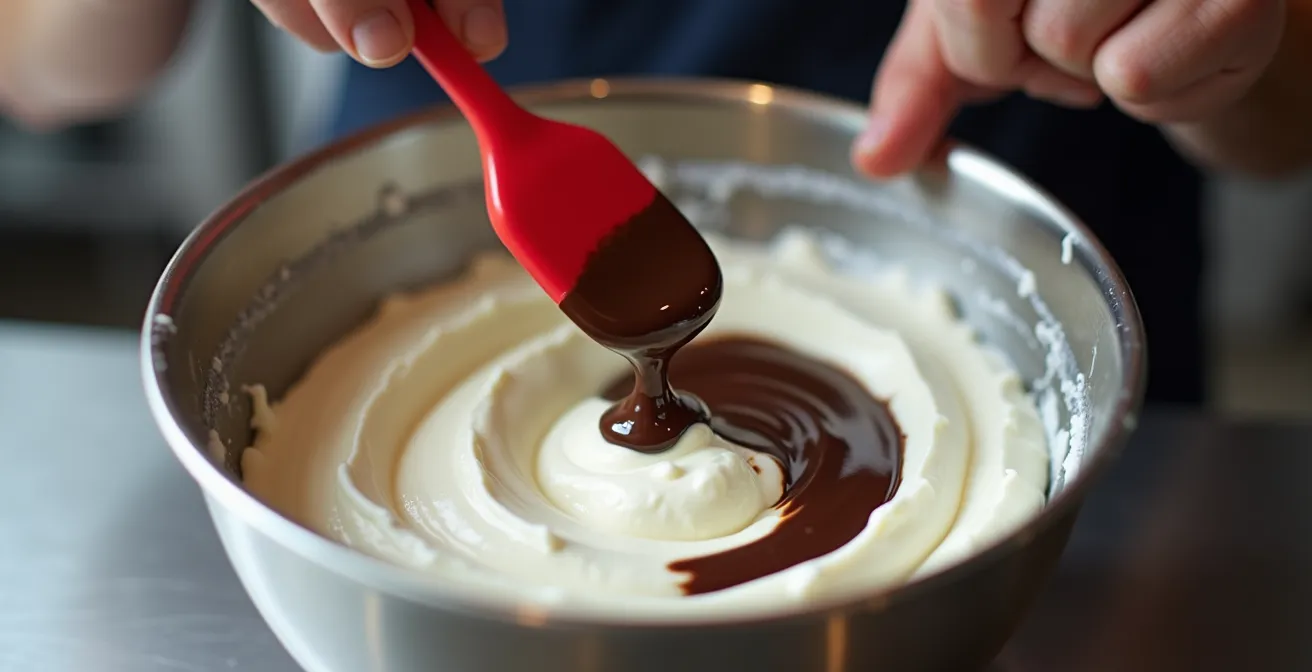
Case Study: Chef Dominique Ansel’s Professional Folding Technique
Chef Dominique Ansel’s method highlights the importance of temperature. He demonstrates the professional technique of slowly pouring the ganache into the whipped cream while constantly folding with a large rubber spatula. The critical step is cooling the ganache to room temperature. Expert advice, such as that from Chef Dominique Ansel, recommends maintaining ganache at 90 to 95°F (32 to 35°C). This ensures the ganache remains fluid but won’t melt the whipped cream, preserving the airy texture essential for mousse.
The “sacrificial method” is a mechanical technique to temper this process. Instead of pouring the chocolate directly into the bulk of the cream, you first fold about a third of the whipped cream *into* the chocolate. This initial mixture will deflate—that’s expected. You are “sacrificing” a portion of the foam to lighten the chocolate base, making its density and temperature closer to that of the remaining cream. This lightened base can then be gently folded into the remaining two-thirds of the cream with minimal volume loss. Use a large, flexible spatula and long, deliberate “cut and fold” motions, scraping the bottom of the bowl and bringing it to the top, rotating the bowl after each fold. This prevents overmixing, which would also destroy the foam.
This two-step process—sacrificing a small amount of foam to temper the base, then gently folding that base into the rest—is the most reliable way to maintain the delicate bubble matrix you worked so hard to create.
By respecting these principles, you ensure the chocolate is evenly incorporated while preserving the maximum amount of air, leading to a light, not leaden, mousse.
35% vs 40% Cream: Which Whipped Cream Holds Longer?
The percentage on a carton of cream isn’t just a number; it’s a direct indicator of its structural potential. The fat in heavy cream is what provides stability to a foam. When cream is whipped, the fat globules, partially broken by the mechanical action, cluster around the air bubbles, forming a protective, semi-rigid cage. More fat means a stronger, more resilient cage. This is why a whipped cream made from 40% butterfat cream holds its shape significantly longer than one made from 35% cream.
A 35% cream produces a lighter, more delicate foam that is perfect for a soft dollop on a slice of pie. Its lower fat content results in a softer structure that is more prone to weeping over time. A 40% cream, on the other hand, creates a much more robust and dense foam. This makes it the superior choice for applications requiring shear stability—that is, the ability to be piped, hold sharp details, and be incorporated into a mousse that needs to set firmly enough to be sliced. For the most stable mousses, some professional pastry recommendations indicate using 40-50% fat content cream for optimal mousse structure.
The choice between them is purely functional. For a light-as-air mousse intended for immediate consumption, 35% cream can work beautifully. For an entremet that needs to hold its structure in a display case or be transported, 40% cream is non-negotiable. The richer mouthfeel of the 40% cream is also a factor, as it coats the palate more, which can either enhance or mute the other flavors in the dessert.
| Characteristic | 35% Cream | 40% Cream |
|---|---|---|
| Foam Stability | 3-4 hours | 6+ hours |
| Texture | Lighter, more delicate | Denser, more robust |
| Best Use | Light accompaniments, with stabilizers | Piping, structural mousses |
| Mouthfeel | Less coating, flavor-forward | Richer, coats palate |
Therefore, analyzing the required performance of your final product—its shelf life, structural demands, and desired mouthfeel—should dictate your choice of cream.
The Temperature Mistake That Causes Chocolate Chips in Mousse
A perfectly smooth chocolate mousse that is marred by a grainy texture or unwelcome “chocolate chips” is a common and frustrating failure. This defect is almost always caused by a temperature shock, a phenomenon known as seizing. It occurs when a warm, melted chocolate base is combined too quickly with a much colder ingredient, like whipped cream straight from the refrigerator. The cocoa butter in the chocolate solidifies instantly upon contact with the cold, forming hard, unpleasant specks instead of emulsifying smoothly into the base.
The key to avoiding this is minimizing the temperature differential between your components. Professional guidance is clear on this point; as a general rule, you must avoid a large temperature gap between your components. In fact, temperature control studies show that a >20°C gap between chocolate and cream causes seizing. This is why the “sacrificial method” described earlier is so effective. By first mixing a small portion of the cold cream into the warm chocolate, you are gently lowering the chocolate’s temperature and raising the cream’s temperature, creating a “bridge” or intermediate stage. This tempered base can then be incorporated into the rest of the cold cream without causing the cocoa butter to instantly solidify.
Furthermore, the temperature of the chocolate itself is critical not just for texture but for volume. According to the Pastry Living Professional Guide, “Very warm chocolate pops the air bubbles in pâte à bombe and whipped cream, which creates less airy mousse.” So, not only does overly warm chocolate risk a grainy texture, but it also actively destroys the lightness you’re trying to achieve. The ideal temperature for your melted chocolate or ganache base is lukewarm, around 90-95°F (32-35°C), which is cool enough to not melt the cream but warm enough to remain fluid and emulsify perfectly.
In essence, achieving a silky-smooth mousse is a thermal balancing act. By ensuring your components are not thermal opposites, you guarantee a seamless integration and a flawless final texture.
When is Mousse Ready: The “Wiggle Test” for Doneness
Determining when a mousse is perfectly set is less about a fixed time and more about observing visual and textural cues. The exact setting time depends heavily on the stabilizer used (gelatin, egg whites, or just chocolate) and the temperature of your refrigerator. While recipes provide a guideline, the final call comes down to a simple physical assessment often called the “wiggle test.” A properly set mousse should be firm enough that it doesn’t slosh around when the container is gently shaken. It should jiggle as a whole, like a soft pudding, rather than ripple like a liquid.
For a mousse stabilized with gelatin, the setting process is about allowing the collagen network to fully form and trap the liquid. This process requires time and cold. While it may seem firm after a couple of hours, a full set often takes longer. For a reliable structure, proper gelatin stabilization requires at least 5-6 hours of refrigeration. For mousses that will be part of a larger entremet, many chefs prefer an even longer chill.
Case Study: Professional Mousse Setting Indicators
Chef Dominique Ansel’s technique involves refrigerating mousse for at least 12 hours to achieve a proper, deep-set texture. His initial goal is a consistency akin to mayonnaise when the mousse is first mixed. After proper chilling, it should develop a firm but yielding texture. A crucial professional step is to press plastic wrap directly onto the surface of the mousse before chilling. This prevents a “skin” from forming, which would disrupt the homogenous, silky texture of the final product.
Your Mousse Texture Audit Checklist
- Assess initial consistency: Before chilling, does the mousse have the thick but flowing texture of mayonnaise or very soft-set yogurt? If it’s too liquid, it may not set properly.
- Perform the wiggle test: After the recommended chilling time, gently shake the dish. Does the mousse jiggle uniformly, or does a liquid wave move across the surface? Uniform jiggle indicates a proper set.
- Check the surface: Is the surface smooth and homogenous? Look for weeping (syrup leakage), which indicates a broken emulsion, or a tough skin, which means it wasn’t covered properly during chilling.
- Test with a spoon: A spoonful of mousse should hold its shape, showing the fine bubble structure. It should be light, not gummy (too much gelatin) or runny (under-set).
- Analyze the mouthfeel: Does it melt smoothly on the tongue, or does it feel grainy (temperature shock) or fatty (emulsion broke)? The ideal texture is clean and dissolves evenly.
Ultimately, patience is the final ingredient. Rushing the chilling process is the surest way to serve a soupy, disappointing dessert. Trust the wiggle test, not just the clock.
Why Low-Fat Cream Fails to Hold Air When Frozen?
Freezing a mousse or whipped cream introduces a new, powerful enemy to its delicate structure: ice crystals. When water freezes, it expands and forms sharp, jagged crystals that can easily pierce and shred the delicate protein or fat networks holding air bubbles. This is why low-fat cream, with its higher water content and weaker fat structure, fails spectacularly when frozen. It lacks the necessary structural reinforcement to withstand the physical damage of freezing and thawing.
The fat particles in the cream will surround the air bubbles and ensure a light foam is formed
– FoodCrumbles Science Team, How to Make Chocolate Mousse – Science of Stabilizing Foams
Heavy cream with a high butterfat percentage is essential for frozen stability. The fat globules don’t just trap air; they form a robust, physical barrier around each bubble. This fat network acts as a buffer, preventing ice crystals from directly puncturing the air cells. When the product thaws, this reinforced structure allows it to retain its volume and texture. According to frozen dessert science, it is demonstrated that heavy cream with >35% fat maintains its structure when frozen, with higher percentages providing even better insurance. A low-fat cream simply doesn’t have enough fat particles to build a sufficiently strong protective matrix.
This principle is the foundation of ice cream making. The goal is to keep ice crystals as small as possible through churning and rapid freezing, while the fat content provides the rich mouthfeel and structural stability. A mousse, being a static foam, relies even more heavily on its intrinsic fat structure to survive the freezing process. Using low-fat cream is setting the mousse up for failure, as the thawed result will inevitably be a grainy, weeping mess where the air, fat, and water have all separated.
Therefore, for any mousse or whipped topping that will be frozen, using a high-fat cream (at least 35%, preferably 40%) is not a suggestion, but a structural necessity.
Why Nitrogen Bubbles Are Smaller and Smoother Than Soda?
To understand the fundamental difference between an egg white foam and a gelatin-stabilized foam, a powerful analogy can be found in beverage carbonation: the difference between carbon dioxide (CO2) and nitrogen. CO2, used in sodas, is highly soluble in water and creates large, aggressive bubbles that provide a sharp, carbonic “bite.” Nitrogen, used in nitro coffee or stout beers, is far less soluble, resulting in a cascade of tiny, stable bubbles that create a famously smooth, creamy texture.
This is a near-perfect parallel for our stabilizers. Egg white foam is like CO2. It creates a vast number of bubbles, but the protein network is fragile and the bubbles are prone to merging and collapsing, especially over time or with temperature changes. The result is an ephemeral, “sharp” lightness that is exciting but unstable. Gelatin foam is like nitrogen. It creates fewer, but much more robust and uniform bubbles. The collagen network is strong and resilient, leading to a smoother, denser, and more velvety mouthfeel that is far more stable over time. The “creaminess” of a nitro coffee is a direct result of its fine, stable bubble structure, just as the richness of a gelatin-set mousse comes from its resilient collagen matrix.
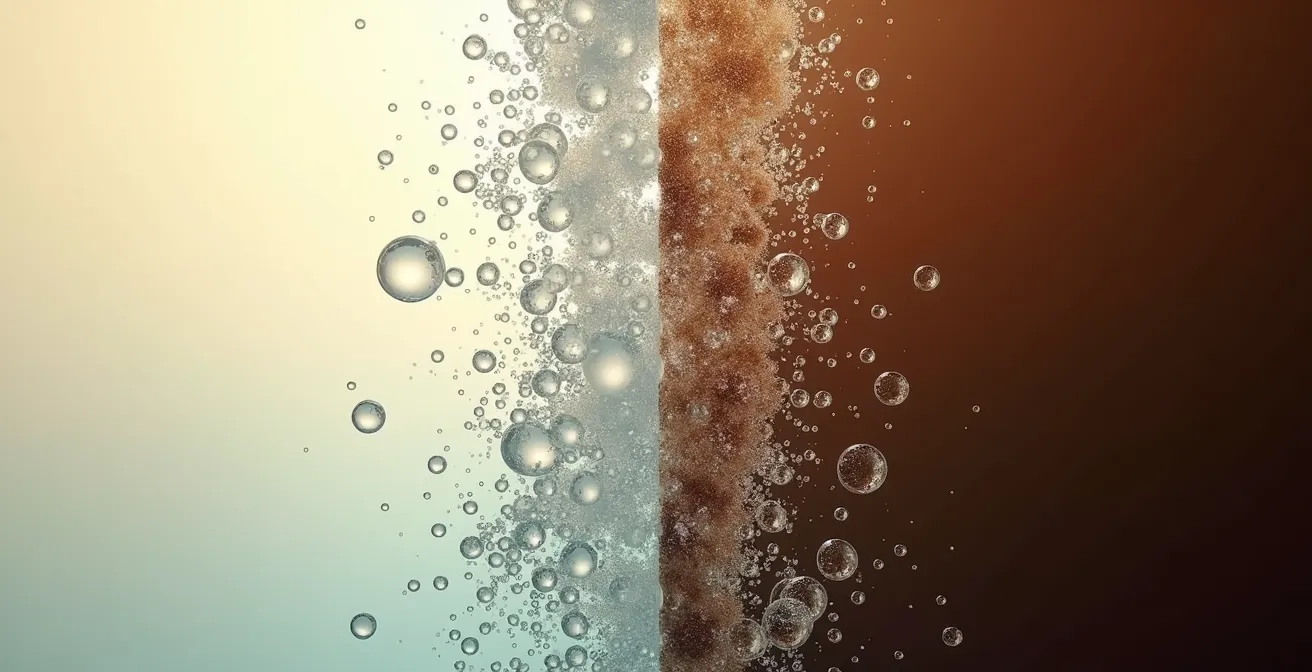
This analogy helps move the discussion beyond “light vs. dense.” It reframes it as a choice of bubble size and stability. An egg white-based mousse offers a texture with high-amplitude but low-duration lightness. A gelatin-based mousse provides a texture with a less aggressive but far more persistent creaminess. The visual difference between the chaotic rise of CO2 bubbles and the gentle cascade of nitrogen bubbles is a perfect mental model for the internal structure of these two distinct types of mousse.
By thinking in terms of bubble physics, a dessert maker can make a more precise, strategic choice to engineer the exact texture they envision for their final product.
Key Takeaways
- Fat is the enemy of an egg white foam, as it disrupts the protein network at a molecular level.
- Temperature control is paramount. A large temperature gap between chocolate and cream causes seizing (graininess), while overly hot chocolate deflates the foam.
- Higher fat content in cream (40% vs. 35%) creates a more robust fat network around air bubbles, leading to significantly better stability for piping and freezing.
Why Your Mirror Glaze Is Dull and How to Get That Shine?
A mirror glaze is the ultimate expression of surface science in pastry. Its iconic, flawless shine is not a result of a single magic ingredient, but the precise control of temperature, viscosity, and application technique. A dull, cloudy, or translucent glaze is typically a failure in one of these areas. The shine, or specular reflection, is achieved when the glaze sets into a microscopically smooth surface that reflects light uniformly, like a mirror. Any imperfection—crystallization, air bubbles, or improper setting—will diffuse the light and make the surface appear dull.
Case Study: Chef Christophe Rull’s Mirror Glaze Technique
The technique of professionals like Chef Christophe Rull reveals the necessary precision. The process involves using glucose syrup to prevent sugar crystallization, which would create a grainy, matte surface. The glaze must be heated to a specific temperature to achieve the perfect fluidity; for many recipes, professional mirror glaze requires heating to 222°F (106°C). It is then cooled to an exact application temperature, typically around 95°F (35°C), before being poured. The most critical step is applying it to a hard-frozen entremet. The thermal shock causes the glaze to set almost instantly, locking in that perfectly smooth surface before it has a chance to ripple or drip unevenly. This instant set is what creates the flawless finish essential for a true mirror-like shine.
This entire process is a masterclass in applying the principles we’ve discussed. Just as with mousse, success depends on managing the physical state of fats and sugars through temperature. A glaze that’s too hot will be too thin and won’t cling to the cake, resulting in a translucent, sad coating. A glaze that’s too cold will be too viscous, setting unevenly and creating a thick, bumpy, or “lumpy” surface. The shine is born in that perfect window where the glaze is fluid enough to pour smoothly but viscous enough to coat evenly and set instantly. Achieving that requires an accurate thermometer and an understanding of the material science at play.
Now that you understand the science of texture and shine, the next step is to apply these principles. Start by analyzing your current recipes to identify where controlling temperature and fat content can elevate your desserts from good to exceptional.