
The safety and success of an edible photo on a cake isn’t magic; it’s a matter of controlling moisture and using highly regulated ingredients.
- Edible inks are composed of simple, food-safe components like water, glycerin, and certified colorants, all designed to be safely metabolized.
- Most application failures, like blurring or tearing, are caused by “moisture migration”—water moving from the frosting to the sugar-based sheet.
Recommendation: For the best and safest results, always choose high-resolution frosting sheets over wafer paper, ensure your frosting surface is tacky (not wet), and apply the image just before serving.
You’ve seen them on Pinterest and at birthday parties: cakes adorned with a perfect, glossy photograph of a child’s favorite character or a cherished family photo. The effect is stunning, but a question often lingers in a parent’s or party planner’s mind: what exactly *is* that image made of, and is it truly safe to eat? The immediate reassurance is often a quick “it’s just food coloring,” but for anyone concerned about chemicals and what their family consumes, that answer feels incomplete. It doesn’t explain how a desktop printer can suddenly process food or why some attempts result in a vibrant masterpiece while others become a soggy, blurry mess.
The anxiety is understandable. We’re taught to be cautious about non-food items near our food. The idea of “printing” something edible can feel counterintuitive and brings up valid concerns about industrial chemicals, printer mechanics, and unknown ingredients. This article will put those concerns to rest by approaching the topic not as a baker, but as a food technologist. We will move beyond the platitudes and dive into the science. The key to both safety and a perfect result lies not in baking magic, but in understanding the simple food science behind the ingredients, the physics of moisture control, and the different substrates you can print on. We’ll break down what edible ink is, why things go wrong, and how to get it right every time, ensuring your beautiful cake is as safe as it is spectacular.
Summary: The Science and Safety of Edible Cake Printing
- Why Edible Ink is Made of Sugar and Coloring?
- How to Apply a Sugar Sheet Without It Melting or Tearing?
- Wafer Paper vs Frosting Sheets: Which Has Better Resolution?
- The Moisture Mistake That Blurs Your Edible Photo
- When to Print the Image: Shelf Life of Edible Ink
- The Garnish Mistake That Makes Desserts Look Messy
- Why Glazing a Frozen Cake is Essential for Shine?
- How to Plate Desserts Like a Chef Using Just a Spoon?
Why Edible Ink is Made of Sugar and Coloring?
The primary concern for any parent is safety, and this starts with the ink itself. The term “ink” can be misleading, as it conjures images of industrial solvents and pigments. In reality, edible ink is a simple, water-based food product meticulously designed for consumption. It’s not a chemical cocktail but a carefully balanced recipe where each ingredient serves a specific, food-safe purpose. The entire system is built around ingredients that are “Generally Recognized As Safe” (GRAS) by regulatory bodies like the FDA. In fact, a recent review shows that 34 substances received FDA ‘no questions’ GRAS status in the first half of 2025 alone, demonstrating the rigorous and ongoing oversight in this area.
The core components of edible ink are surprisingly straightforward and chosen for their functionality both in the printer and in the body:
- Water: This is the primary solvent. It’s the carrier that transports the colorants from the cartridge, through the printer nozzles, and onto the edible paper. It’s purified to prevent any contaminants from interfering with the process.
- Glycerin: This ingredient is a humectant, meaning it attracts and retains moisture. Its role is crucial: it keeps the ink fluid and prevents it from drying out and clogging the delicate print heads, which is a major technical challenge.
- Ethanol: A small amount of food-grade ethanol is often included. It serves two purposes: it acts as a preservative, extending the ink’s shelf life, and it helps the ink dry more quickly once it’s on the paper, reducing the chance of smudging.
- FDA-approved Colorants: This is the most critical part. Edible inks use water-soluble dyes, not pigments. Dyes dissolve completely in the water base, allowing them to pass through printer nozzles without issue. These are the same types of colorants you’d find in candies, drinks, and other processed foods, all certified for safe metabolism.
Essentially, edible ink isn’t “ink” in the traditional sense at all. It’s a liquid foodstuff, engineered for printability. Every component is selected to be harmless, digestible, and functional, ensuring the final print is as safe to eat as the cake it sits on.
How to Apply a Sugar Sheet Without It Melting or Tearing?
Once you have a beautifully printed, food-safe image, the next hurdle is transferring it to the cake. This is where most disasters happen. A sugar sheet, also known as a frosting sheet, is essentially a very thin layer of icing bonded to a plastic backing. Its structural integrity is entirely dependent on moisture content. Too much moisture from the frosting or your hands will cause it to dissolve and tear; too little will prevent it from bonding with the cake. The goal is to find the perfect balance.
Case Study: The “Tacky, Not Sopping” Technique
Professional bakers have a mantra for this process: the frosting surface must be “tacky—not sopping wet, not bone dry.” As one baker shared with the equipment supplier Watson & Webb, this lesson is often learned the hard way. “I botched my first try with a soggy cake. The image turned into a tie-dye mess,” he recalled. The solution, according to their professional guide, is to apply the sheet to a freshly crusted but still-moist buttercream or fondant. Application should start from the middle and be smoothed outward with dry palms. The cardinal rule is to avoid water at all costs, as it will cause the colors to run instantly.
Achieving this perfect application consistently requires a methodical approach. Rushing the process or handling the sheet incorrectly can lead to air bubbles, tears, or fingerprints on your perfect photo. The following checklist outlines the professional method for applying a sugar sheet to ensure a seamless, professional finish.
Action Plan: Professional Sugar Sheet Application
- Prep the frosting surface: Ensure your cake’s frosting is smooth and has become slightly tacky to the touch, not freshly applied and wet, nor completely hardened and dry.
- Handle the sheet gently: Before peeling from the plastic backing, handle the sheet only by its edges to avoid leaving fingerprints or oils on the printed image.
- Place from the center: Align the sheet and gently lay the middle down first. Then, smooth the sheet outward towards the edges with the palm of your hand to push out any air.
- Fix imperfections: If small air bubbles appear, gently pat them out with dry fingertips. Never use a wet tool or finger, as this will dissolve the ink.
- Let it acclimatize: Allow the sheet to sit on the cake for 20-30 minutes at room temperature. This allows it to meld with the frosting before you consider refrigerating the cake.
Wafer Paper vs Frosting Sheets: Which Has Better Resolution?
Not all edible paper is created equal. The two primary types available are frosting sheets (or icing sheets) and wafer paper. While both are edible, they have fundamentally different compositions that drastically affect the final print quality, taste, and application. For a parent wanting a vibrant, photo-realistic image, understanding this difference is crucial to meeting expectations. Wafer paper is a starch-based, stiff, and slightly translucent paper. Frosting sheets are thin layers of flexible icing bonded to a plastic backing sheet. This structural difference directly impacts print resolution.
Resolution in printing is measured in Dots Per Inch (DPI). A higher DPI means more detail and a sharper image. Frosting sheets have a smooth, non-porous surface that can hold a high density of ink dots, allowing for resolutions of 300 DPI or more, similar to regular photo paper. Wafer paper, being more porous and fibrous, cannot hold ink with the same precision. The ink tends to bleed slightly, resulting in a lower effective resolution and a softer, less vibrant image. The choice between them depends entirely on the desired outcome, as outlined in a detailed guide from professional bakery suppliers.
| Paper Type | Print Resolution | Color Vibrancy | Mouthfeel | Best Use Case |
|---|---|---|---|---|
| Frosting Sheets | Highest (300+ DPI) | Most vibrant colors | Dissolves seamlessly | Photo-realistic images |
| Wafer Card (Double Density) | Second best quality | Good color retention | Slightly noticeable | Stand-up toppers |
| Standard Wafer Paper | Lower resolution | Colors appear muted | Papery texture initially | 3D decorative elements |
Ultimately, for a “photo on a cake,” a frosting sheet is the superior choice. It delivers the vibrant colors and sharp detail necessary for a realistic image and has the added benefit of melting into the frosting, leaving no discernible texture. Wafer paper is better suited for decorative elements that stand up from the cake, like printed leaves or flowers, where its rigidity is an advantage.
The Moisture Mistake That Blurs Your Edible Photo
The single greatest enemy of a crisp edible image is uncontrolled moisture. This is the core principle of edible print science. Both the ink and the sugar sheet are designed to dissolve in water—that’s what makes them melt in your mouth. However, this property also makes them incredibly vulnerable to any unintended moisture, whether from the environment, the frosting, or even the temperature difference between your freezer and your kitchen. This phenomenon is known as moisture migration, and it is the culprit behind almost all blurred or bleeding images.
Case Study: Diagnosing the Source of the Blur
Experienced bakers know how to diagnose the source of the blur by its appearance. If the entire image looks slightly fuzzy and out of focus, the cause is likely high ambient humidity in the room, which softened the sugar sheet before it was even applied. However, if the blur appears as colors bleeding outward from the edges of the sheet, the cause is an overly wet frosting surface. As one baker wryly noted, when water touches the print directly, the colors can “run faster than a kid after ice cream.” This distinction is critical for troubleshooting and prevention.
Achieving that professional, crystal-clear result requires a delicate touch and a controlled environment. The process is about precision and understanding the delicate interplay between temperature and humidity. The image below illustrates the careful, deliberate moment of application that professionals use to prevent moisture-related disasters.
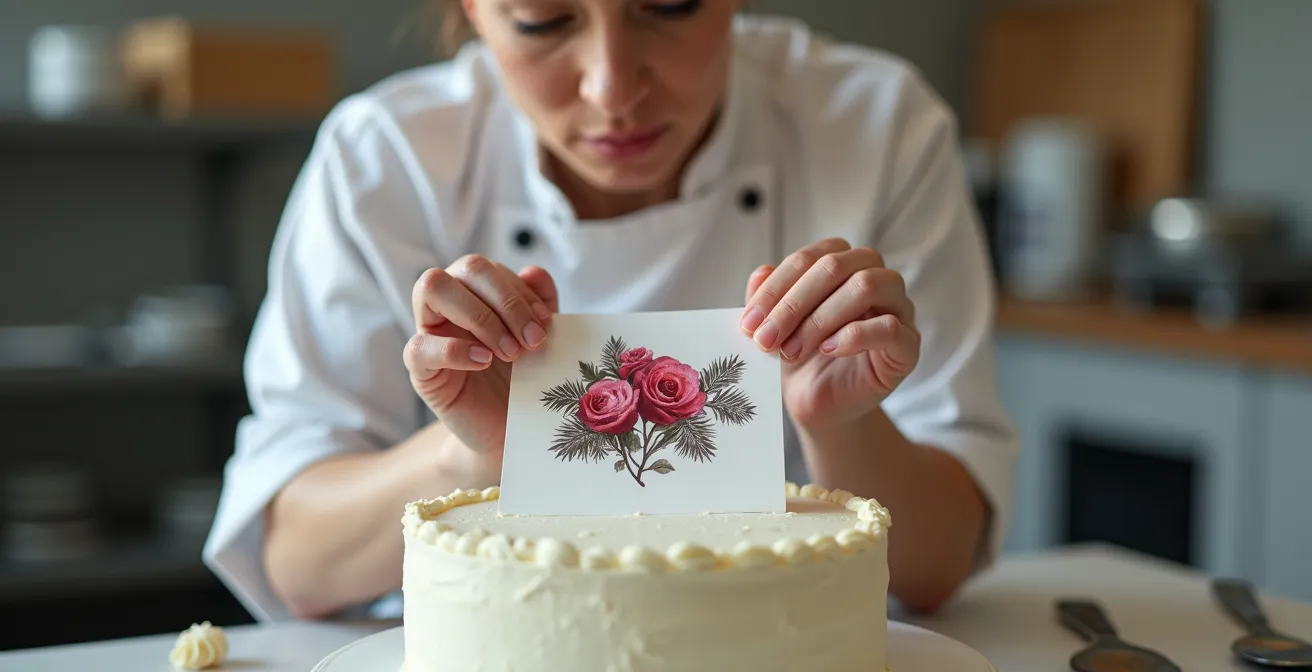
As you can see, the process is about control. The best way to combat moisture migration is to create a workflow that minimizes the contact time with moisture and temperature fluctuations. To prevent blurring and ensure a sharp final image, professionals follow a clear sequence of operations:
- Print the image using your printer’s high-quality settings to ensure maximum ink saturation and detail.
- Allow the printed sheet to air-dry on a clean, flat counter for at least 15-20 minutes. This helps the ink set and reduces surface moisture.
- While the sheet is drying, flash-freeze the frosted cake for 5-10 minutes. This makes the frosting surface very firm and less prone to releasing moisture upon contact.
- Immediately apply the sheet from the center, smoothing outward, before condensation can form on the cold cake.
When to Print the Image: Shelf Life of Edible Ink
A common question is whether you can print edible images far in advance. While technically possible, the quality degrades over time. This involves two separate timelines: the shelf life of the ink cartridges themselves and the longevity of the printed image. From a food technologist’s perspective, both are governed by ingredient stability and potential for contamination. Unopened, factory-sealed edible ink cartridges are designed for longevity. The sterile environment and preservatives ensure they are safe and effective for a considerable time. However, once that seal is broken, the clock starts ticking.
According to manufacturer specifications, the typical shelf life is around 12 months for sealed cartridges and drops to 6 months once opened. This is not just about color quality; it’s about food safety. An opened cartridge is exposed to the air, creating a potential environment for bacterial growth over time, especially given the ink’s water and sugar content. Using ink past its recommended date can lead to poor color quality, nozzle clogs, and, in a worst-case scenario, introducing contaminants to your food.
The printed image also has a shelf life. While a printed sheet, properly sealed in an airtight bag away from light, can last for months, its peak quality is in the first few days or weeks. Over time, ambient humidity can slowly cause the colors to fade or blur, and the sheet can become brittle. For this reason, professional bakeries almost universally practice “just-in-time” printing. They print the image as close as possible to the time of application, often on the same day the cake is due. This ensures the colors are at their most vibrant, the lines are at their sharpest, and the sheet is at its most pliable and easiest to apply. For a parent planning a party, the best practice is to print the image no more than a day or two before the event for a guaranteed beautiful result.
The Garnish Mistake That Makes Desserts Look Messy
Once your edible image is perfectly applied, the final step is garnishing the cake. This is a moment where a beautiful design can be unintentionally undermined. The biggest mistake is treating the garnish as an afterthought or allowing it to interfere with the edible print. A chef’s approach is one of intention and control, using garnishes to frame and enhance the centerpiece—the photo—not to obscure or damage it. The same moisture that blurs a print can also be introduced by “wet” garnishes like fruit compote, gels, or even fresh-cut strawberries.
When these wet elements touch the edge of the sugar sheet, they can cause the ink to bleed, creating a messy, unprofessional border. The principle of containment is key. Garnishes should be used to create a deliberate frame or a separate visual element, maintaining a “safe zone” of clean frosting around the image. This not only protects the print but also makes the overall design look more polished and intentional. Leaving areas of “negative space”—clean, undecorated surface—is a powerful design tool that allows the eye to focus on the main event.
To avoid a cluttered or messy look and protect your hard work, apply professional garnish techniques:
- Create deliberate frames: Use dry elements like mini pearls, sprinkles, or piped buttercream to create a neat, intentional border around the edible image.
- Apply protective borders: A light dusting of cocoa powder or powdered sugar around the print can create a beautiful visual separation and a subtle moisture barrier.
- Avoid wet garnishes at the edge: Keep cut fruit, coulis, and gelées away from the print’s edges. If you must use them, place them on a different part of the cake.
- Use the containment principle: Think about framing the print rather than flooding the area around it. A few well-placed elements are more effective than a random scattering of sprinkles.
- Consider negative space: Don’t feel the need to cover every inch of the cake. Leaving clean, open areas of frosting helps to highlight the printed design and gives the cake a more elegant, chef-inspired look.
Why Glazing a Frozen Cake is Essential for Shine?
While most edible prints are applied to buttercream or fondant, an advanced and highly effective surface is a mirror glaze. This technique, often seen on high-end pâtisserie, provides the ultimate canvas for an edible photo. A mirror glaze is a gelatin-based mixture that is poured over a frozen cake. As it hits the cold surface, it sets almost instantly into a perfectly smooth, glass-like, non-porous layer. For edible printing, this surface is ideal for several scientific reasons.
First, it creates a perfect moisture seal. The set gelatin in the glaze forms a barrier that prevents any moisture from the cake’s interior (like from mousse or cream fillings) from migrating upward and dissolving the sugar sheet. This completely eliminates one of the primary sources of print failure. Second, the surface is flawless. Unlike buttercream, which can have tiny imperfections or air bubbles, a mirror glaze is perfectly flat, ensuring the edible print makes uniform contact and appears completely seamless, as if printed directly onto the cake itself.
Case Study: The Mirror Glaze as the Ultimate Canvas
Pastry chefs who specialize in modern cake design report that a perfectly set, non-porous mirror glaze offers the best possible surface for frosting sheets. The cold, firm nature of the glazed cake helps to “set” the print instantly upon contact, preventing any shifting or wrinkling during application. This cold shock also minimizes the time for any moisture interaction, locking in the sharpness of the image. The glaze provides a stable, sealed foundation that protects the print’s integrity from the moment of application until it is served.
Applying an edible image to a mirror-glazed cake elevates the final product to a professional level. The intense shine of the glaze complements the printed image, creating a stunning visual effect. While it’s a more advanced technique, it is a perfect example of how controlling the cake’s surface science leads to a superior result for the edible artwork placed upon it.
Key Takeaways
- Edible ink is safe by design, using simple, FDA-regulated food-grade ingredients like water, glycerin, and soluble dyes.
- The primary cause of blurred or torn edible prints is uncontrolled moisture migration from frosting or the environment.
- For photo-realistic images, high-resolution frosting sheets are technically superior to porous wafer paper, as they hold more detail and melt seamlessly into the cake.
How to Plate Desserts Like a Chef Using Just a Spoon?
The phrase “plate like a chef” often brings to mind complex sauces, elaborate garnishes, and a dozen different tools. However, in the context of an edible print cake, the philosophy is much simpler. The spoon, in this case, is a metaphor for precision and control. A chef’s primary goal is to make the main ingredient—in this case, your beautiful edible photograph—the hero of the plate. Everything else is secondary and must serve to enhance it. The real secret to a chef-level finish is not adding more, but taking away distractions.
Think of the cake’s surface as your canvas and the edible print as your masterpiece. A chef wouldn’t haphazardly throw paint at a canvas. They would ensure the canvas is prepped, clean, and ready. This is why we’ve discussed creating a tacky, not wet, frosting surface or using a sealed mirror glaze. The “spoon” represents the small, precise actions you take: smoothing the image from the center outwards with your palm, using a dry finger to pat out a single air bubble, or placing a border of sprinkles with intention rather than just scattering them.
This level of precision extends to the final presentation. A chef uses the rim of the plate to keep the presentation clean. For your cake, this means ensuring the edges of the print are perfectly adhered, the surrounding frosting is smooth, and any garnishes are deliberately placed to frame, not flood, the image. The most impressive “chef-like” result is often the simplest: a perfect, crisp, vibrant image sitting flawlessly on a clean, well-prepared cake. The “spoon” is your focus, your attention to detail, and your respect for the materials. It’s the understanding that the final touch is not an extra swirl of sauce, but the perfection of the central element.
Ultimately, achieving a beautiful and safe edible print comes down to understanding and respecting the food science at play. By choosing the right materials, controlling moisture, and applying the image with care, you can confidently create a stunning centerpiece for your celebration that is as safe as it is memorable.
Frequently Asked Questions on How Edible Printing Works and Is It Safe to Eat?
Does expired edible ink become unsafe to eat?
Expired ink in sealed cartridges is unlikely to be harmful but produces poor colors. However, used and old cartridges can pose bacterial growth risks.
How long do printed edible images last?
Printed images should be used within weeks for best quality, though sealed in airtight bags they can last up to 6 months.
Should I print edible images in advance?
Professional bakeries use ‘just-in-time’ printing, ideally same day, to ensure maximum color vibrancy and sharpness.