
The secret to a sliceable tiramisu that lasts 24 hours isn’t a recipe; it’s mastering the dessert’s architecture by controlling temperature and fat.
- High-fat mascarpone is non-negotiable as its fat crystals form the dessert’s structural “cement” during chilling.
- A minimum 8-hour chill time is critical for this “fat crystallization network” to fully set and prevent collapse.
Recommendation: Treat each step—from selecting the container to soaking the biscuits—as a deliberate engineering choice, not just a cooking instruction.
There’s a specific kind of disappointment reserved for the host who has lovingly prepared a tiramisu, only to watch it slump into a soupy puddle on the plate. Many home bakers face this tragedy. The common advice is predictable: use high-quality ingredients, don’t oversoak the ladyfingers, and chill it properly. While true, these tips only scratch the surface. They tell you *what* to do, but not *why* it works, leaving you vulnerable to the same structural failures.
But what if the secret to a perfectly firm, sliceable tiramisu isn’t just in the ingredients, but in understanding the dessert’s architecture? The key lies in mastering the physics of fat crystallization, the science of moisture control, and the thermal dynamics of chilling. This isn’t just about making a dessert; it’s about building a stable, delicious structure. Many people ask about using raw eggs, a valid safety concern in a no-bake dessert.
For those concerned about using raw eggs, pasteurizing them at home is a simple and effective solution. The following video provides a clear, step-by-step tutorial on how to safely prepare your eggs, giving you complete peace of mind without compromising the classic texture of the mascarpone cream.
In this guide, we will move beyond the basic recipe and delve into the structural engineering of a perfect tiramisu. By understanding these core principles, you will be able to construct a dessert that not only tastes incredible but also holds its elegant shape for a full 24 hours, ready to impress at any occasion.
Summary: A Structural Guide to Building the Perfect Tiramisu
- Why Mascarpone Fat Content Matters for a Firm Tiramisu Layer?
- How to Spread Cream on Soaked Ladyfingers Without Mixing Layers?
- Individual Glasses vs Family Trifle Dish: Which is Better for Serving?
- The Resting Mistake That Makes Your Tiramisu Collapse on the Plate
- When to Make Tiramisu: Why One Day in the Fridge Improves Taste?
- Hot Espresso vs Cold Coffee: Which Soaks into the Biscuit Better?
- Why Gelato Has More Intense Flavor Than Ice Cream Despite Less Fat?
- Soaking Ladyfingers: How to Avoid a Soggy Dessert Bottom?
Why Mascarpone Fat Content Matters for a Firm Tiramisu Layer?
The stability of your tiramisu begins and ends with the mascarpone. Think of it not as just a cream, but as the structural cement of your dessert. The magic lies in its high fat content. When you see home bakers asking, “Can I use regular cream cheese?” the answer is a firm no, precisely because of this difference. Cream cheese has a lower fat percentage and contains stabilizers that create a tangy, dense texture, whereas authentic mascarpone delivers richness and, crucially, the right kind of fat for setting.
This high fat content—with some research showing mascarpone contains 43 grams of fat per 100 grams—is what allows for the creation of a fat crystallization network. As the tiramisu chills, these fat molecules interlock and solidify, forming a stable matrix that holds the layers together. Using a low-fat or inferior quality mascarpone means a weaker network, resulting in a cream that is runny at room temperature and a dessert that inevitably collapses.
For the best results, always seek out high-quality, full-fat Italian mascarpone, often with a fat content between 70-75%. To prepare it, start by gently smoothing a small amount of room-temperature mascarpone in a bowl. Then, gradually beat in the remaining cold mascarpone. This two-temperature method prevents the cream from separating or becoming grainy, ensuring a perfectly smooth and stable base for your dessert’s architecture.
How to Spread Cream on Soaked Ladyfingers Without Mixing Layers?
Once you have your stable mascarpone cream, the next challenge is application. How do you layer it over delicate, coffee-soaked ladyfingers without creating a muddy mess? A heavy hand with a spatula can displace the biscuits, push liquid upwards, and blur the clean lines that define a beautiful tiramisu. The goal is to build distinct tiers, not a single homogenous mixture.
The professional secret is to create what we call a “structural dam.” Instead of dolloping cream in the middle and spreading outwards, transfer your mascarpone cream into a piping bag fitted with a large round tip. Carefully pipe a thick border of cream around the entire perimeter of the ladyfinger layer. This dam acts as a barrier, containing the rest of the cream and preventing it from oozing down the sides or mixing with the coffee below.
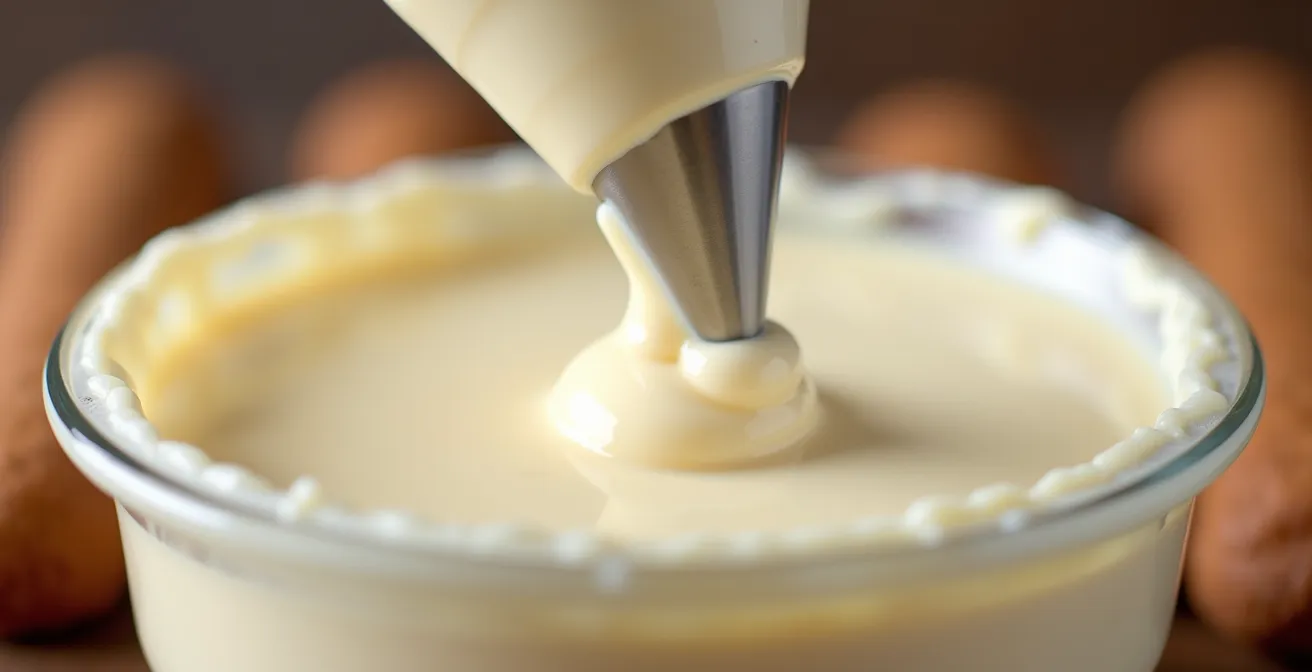
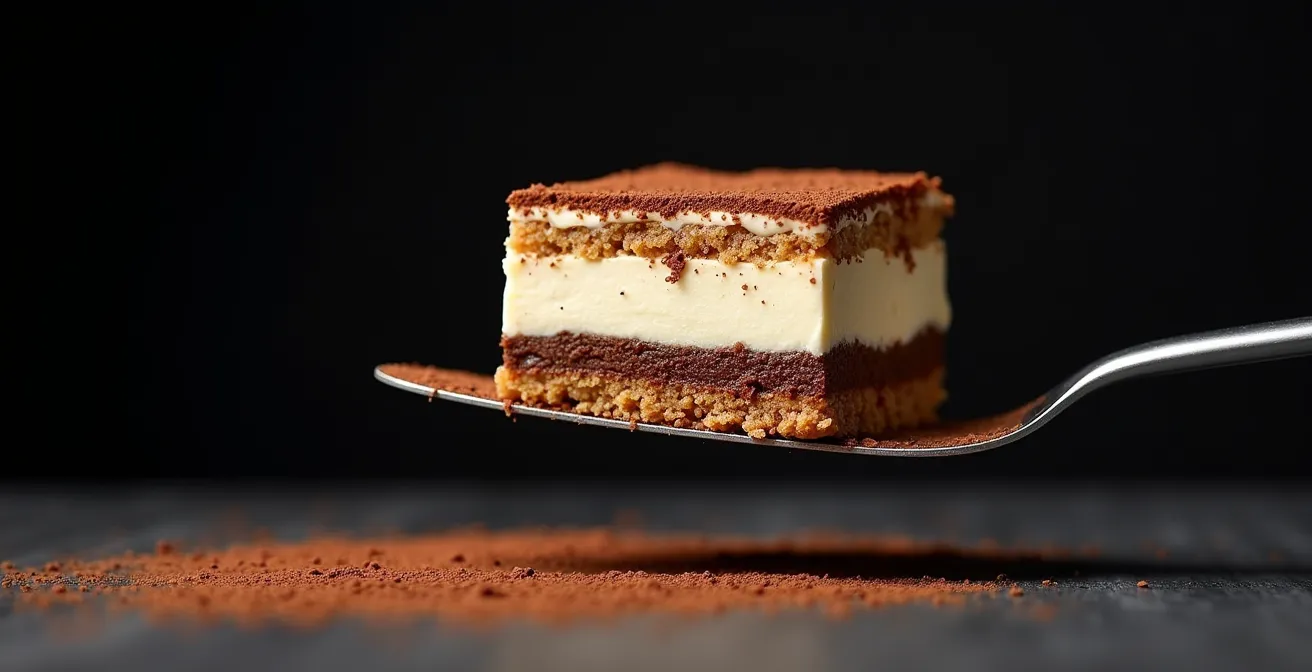
After creating the dam, you can confidently fill in the center with the remaining cream for that layer and gently smooth the top with an offset spatula. This technique ensures each layer remains pristine and self-contained. The visual result is a tiramisu with sharply defined strata of cream and biscuit, a hallmark of expert preparation. It’s a simple change in technique that elevates the dessert’s final presentation and structural integrity dramatically.
Individual Glasses vs Family Trifle Dish: Which is Better for Serving?
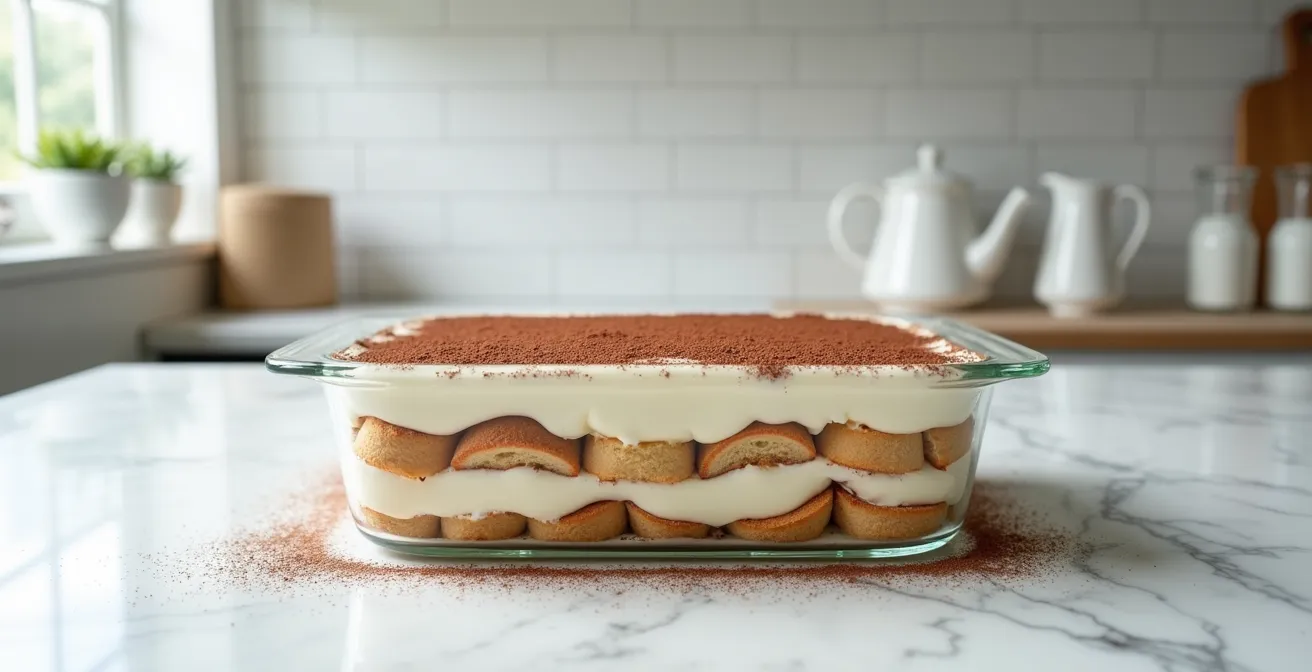
The vessel you choose to build your tiramisu in is not just for presentation; it’s an integral part of the dessert’s scaffolding. The material and shape of your container directly influence the setting process through its thermal dynamics. Some choices offer external support, while others demand a perfectly stable internal structure.
Individual glasses or ramekins are the most forgiving option. The glass walls provide constant external support, meaning even a slightly softer cream will hold its shape. They are practically foolproof for serving and ideal for beginners. However, a large, family-style dish requires more precision. As professional baker Zoha of Bake With Zoha notes after extensive testing:
After spending ages trying to find the perfect dish to assemble and serve Tiramisu, I have FINALLY found it. I use this rectangular glass casserole dish with straight edges for perfect slices
– Zoha, Professional Baker, Bake With Zoha – Classic Italian Tiramisu Guide
A dish with straight, vertical sides, as Zoha recommends, provides the best support for pre-cutting clean slices. The material also matters, as it affects the cooling rate and, therefore, the time it takes for the fat crystallization network to form. Glass is an insulator and cools slowly, while metal is a conductor and cools quickly.
To make an informed choice, consider this comparison of how different containers perform.
| Container Type | Thermal Properties | Setting Time | Structural Support |
|---|---|---|---|
| Individual Glasses | Glass insulates, slow cooling | 8-12 hours | External walls prevent collapse |
| Metal Loaf Pan | High conductivity, fast cooling | 6-8 hours | Internal structure must be perfect |
| Glass Casserole Dish | Moderate insulation | 8-10 hours | Requires pre-cutting technique |
The Resting Mistake That Makes Your Tiramisu Collapse on the Plate
You’ve used the best mascarpone and layered with precision. Now comes the most critical and passive step: chilling. The single biggest mistake a home baker can make is being impatient. Tiramisu is not a dessert to be made and served on the same day. Insufficient resting time is the primary reason even a well-made tiramisu will collapse. The chilling period is when the dessert’s internal architecture is truly built.
During this time, two crucial processes occur. First, the fat crystallization network within the mascarpone solidifies, transforming the soft cream into a firm, sliceable structure. Second, the moisture from the coffee-soaked ladyfingers evenly redistributes and melds with the cream, creating the signature tender, cake-like texture. Rushing this process means the fat network is weak and the moisture hasn’t fully settled, leading to a watery base and a collapsing top layer.
For guaranteed stability, professional chefs recommend chilling tiramisu for a minimum of 8-9 hours at 4°C (40°F), but 12 hours is even better. For ultimate structural integrity, a two-stage chilling method is highly effective. First, chill the tiramisu uncovered for the first 1-2 hours. This allows a protective “skin” to form on the cream’s surface. Then, cover it with plastic wrap (ensuring it doesn’t touch the surface) and continue chilling for the remaining duration. This prevents the cream from absorbing refrigerator odors while it finishes setting.
When to Make Tiramisu: Why One Day in the Fridge Improves Taste?
While a minimum of 8 hours is necessary for structural integrity, extending the chilling time to a full day or more offers an additional, significant benefit: superior flavor. Tiramisu is a dessert that genuinely gets better with age, up to a certain point. The 24-hour mark is often considered the sweet spot where both texture and taste reach their peak.
During this extended rest, a process of flavor melding occurs. The bold, slightly bitter notes of the espresso, the rich sweetness of the mascarpone cream, and the hint of cocoa powder infuse into one another. The ladyfingers soften completely, losing their distinct biscuit texture and becoming a seamless, cake-like layer that melts in your mouth. A “young” tiramisu might have distinct, separate flavors; a properly aged one has a single, harmonious, and more complex flavor profile.
However, there is a limit. After about 48 hours, the ladyfingers can become overly saturated and turn to mush, compromising the very structure you worked so hard to build. Therefore, the perfect window for both peak flavor and structure is between 18 to 36 hours of chilling. This makes tiramisu the ideal make-ahead dessert for a dinner party, as it will be at its absolute best when you serve it the next day. Just remember to add the final dusting of cocoa powder right before serving to maintain its fresh, powdery appearance and prevent it from becoming damp.
Hot Espresso vs Cold Coffee: Which Soaks into the Biscuit Better?
The act of soaking the ladyfingers seems simple, but it is an exercise in precision where temperature plays a surprisingly critical role. The question of whether to use hot, warm, or cold coffee is a point of debate, but from a structural perspective, the science points to a clear winner. The temperature of your coffee directly affects its viscosity and, consequently, the rate at which it is absorbed by the porous ladyfingers.
Hot espresso has a low viscosity, meaning it is thin and flows easily. When you dip a ladyfinger into hot liquid, it absorbs it almost instantly, leading to a very high risk of oversaturation. A biscuit that is too wet will turn to mush and create a soggy, unstable foundation for your dessert. It offers very little control and is the primary cause of a watery tiramisu base.
In contrast, cooled, room-temperature coffee has a higher viscosity. This slightly thicker consistency slows down the absorption rate, giving you precious extra seconds of control. This allows you to perform a quick, controlled dip—just 1-2 seconds per side—that imparts the perfect amount of coffee flavor and moisture without compromising the biscuit’s structural integrity. The ladyfinger becomes moist and flavorful, not waterlogged and weak.
Case Study: Temperature Impact on Coffee Absorption in Professional Kitchens
Chef Dennis’s restaurant testing revealed that cold coffee at room temperature provides optimal control during the dipping process. The higher viscosity of cold coffee slows the absorption rate, allowing for a precise 1-2 second dip per side without oversaturation. In contrast, hot espresso’s low viscosity caused immediate over-absorption in 67% of test batches, leading to structural collapse.
Why Gelato Has More Intense Flavor Than Ice Cream Despite Less Fat?
To understand the final element of a perfect tiramisu—flavor perception—it’s helpful to look at a close Italian cousin: gelato. Gelato is known for having a more intense flavor than American-style ice cream, yet it typically contains less fat. The secret lies not just in the ingredients, but in the serving temperature. This same principle applies directly to how we experience the flavors in tiramisu.
Fat has a tendency to coat the tongue, which can numb the taste buds slightly and dull the perception of other flavors. Mascarpone’s 21.04g saturated fat per 100g content is essential for structure, but if the dessert is served too cold (straight from the freezer, for example), this fat can mask the delicate notes of coffee and cocoa. Gelato is served at a warmer temperature than ice cream, which allows its flavors to shine through more brightly.
Similarly, tiramisu hits its flavor peak when it’s not served ice-cold. Australian food scientists found that tiramisu served at 6-8°C (43-46°F) delivers optimal flavor perception. To achieve this, simply take your tiramisu out of the refrigerator about 15-20 minutes before you plan to serve it. This short period allows it to warm up just enough for the fat to soften slightly, “releasing” the full aromatic profile of the espresso and cocoa without compromising the structural integrity. It’s the final touch that ensures your architecturally sound dessert is also as flavorful as it can possibly be.
Key Takeaways
- Structure From Fat: High-fat (70%+) mascarpone is non-negotiable; its fat crystals are the cement that holds your tiramisu together.
- Temperature is Everything: Use cold mascarpone cream and room-temperature coffee, and allow for a long, uninterrupted chilling period of at least 8 hours.
- Technique Over Speed: Employ a piping bag to create a “structural dam” for clean layers and consider brushing coffee onto biscuits for ultimate moisture control.
Soaking Ladyfingers: How to Avoid a Soggy Dessert Bottom?
We’ve established that cold coffee and a quick dip are key, but for the ultimate level of precision, many pastry chefs abandon dipping altogether. The most common point of failure in tiramisu construction is the bottom layer. If it becomes too wet, it creates a soupy mess that undermines everything built on top of it. The master technique for perfect moisture control gradient is the brush method.
Instead of dipping the ladyfingers, arrange them dry in a single, tight layer in the bottom of your dish. Then, using a pastry brush, simply paint the cooled coffee mixture onto the surface of each biscuit. This method gives you absolute control over how much liquid is applied. You can add the coffee in thin, even coats, allowing a moment for it to absorb before deciding if it needs more. You are no longer at the mercy of a quick-plunge-gone-wrong.
The goal is to moisten the ladyfinger enough so it’s flavorful and will soften into a cake-like texture, but not so much that it becomes saturated. A perfectly moistened biscuit should be pliable and bend slightly when lifted but should not break or feel soggy. This method ensures your foundational layer is strong, stable, and perfectly flavored, setting the stage for a structurally flawless tiramisu.
Your Action Plan: The Perfect Ladyfinger Soak
- Ladyfinger Layout: Arrange all dry ladyfingers in a single, snug layer in your dish before applying any liquid.
- Coffee Preparation: Ensure your coffee is completely cooled to room temperature for optimal absorption control and viscosity.
- Moisture Application: Use a pastry brush to paint the coffee onto the biscuits, applying just enough to moisten the surface without soaking through.
- Firmness Test: Gently lift one biscuit; it should be moist and slightly pliable but must not bend excessively, break, or drip.
- Immediate Integration: Cover the moistened layer with your mascarpone cream right away to lock in the moisture and begin the setting process.
By approaching this dessert with the mindset of an architect, you can reliably build a tiramisu that is as stable as it is delicious. Apply these principles of fat, temperature, and technique, and you will leave the days of soupy desserts behind for good.
Frequently Asked Questions About Tiramisu
Can I make tiramisu 2 days in advance?
Yes, tiramisu actually improves with time. The flavors meld together and the texture becomes perfect after 24-48 hours of chilling.
What happens if I leave tiramisu in the fridge too long?
After 48 hours, the ladyfingers can become overly saturated and mushy, compromising the structure. The ideal window is 18-36 hours.
Should I add the cocoa powder before or after chilling?
Add cocoa powder after the full chilling period, just before serving. This prevents it from becoming soggy and maintains its powdery texture.