
In summary:
- Success depends on controlling cocoa butter’s polymorphic crystallization, not ambient temperature.
- The seeding method, combined with sensory checks like the “lip test,” offers precise control without a thermometer.
- Humidity is a primary cause of sugar bloom; managing moisture on surfaces and in the air is critical.
- Maintaining tempered chocolate within a tight 2°C window is essential to prevent the loss of stable Beta-V crystals.
- Using couverture chocolate with a higher cocoa butter content significantly increases the probability of successful tempering.
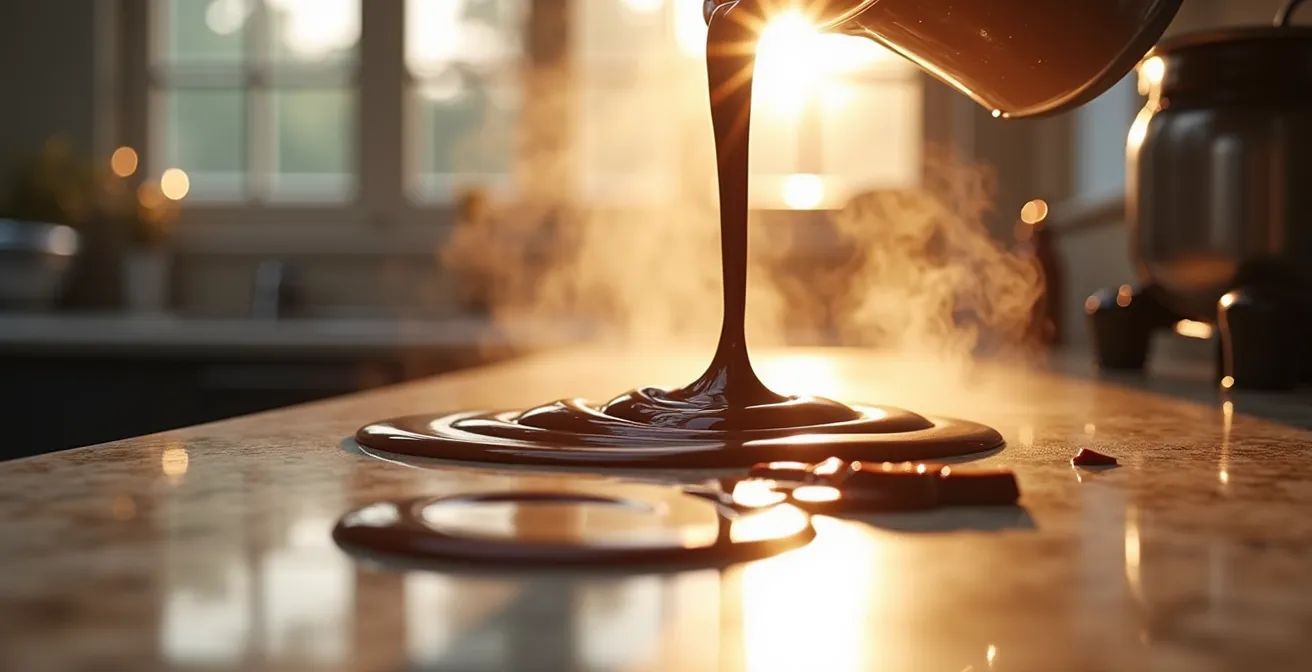
Attempting to temper chocolate in a warm, non-air-conditioned kitchen often feels like a losing battle against thermodynamics. The typical advice—work in a cool, dry room—is impractical for many home chocolatiers. You meticulously follow temperature curves, only to be met with a dull, streaky finish, a soft texture, and the dreaded white film of bloom. This failure is not a flaw in your technique, but a misunderstanding of the underlying physics. The goal is not to cool the room, but to control a specific molecular event: the crystallization of cocoa butter.
Most guides focus on environmental control, but the true key lies in manipulating the phase transitions within the chocolate itself. Instead of fighting ambient heat, a more effective strategy is to force the formation of the most desirable crystal structure. This involves understanding concepts like polymorphism, nucleation sites, and thermal inertia. By mastering these principles, you can dictate the chocolate’s final texture and appearance, achieving a glossy finish and a sharp “snap,” regardless of the temperature on your thermostat. This guide deconstructs the process from a scientific perspective, providing methods to outsmart your environment.
For those who prefer a visual demonstration, the following video outlines the fundamental steps of the tempering process, which we will deconstruct from a scientific standpoint.
This article will guide you through the precise physics and chemistry of chocolate. We will explore the essential nature of Beta-V crystals, compare tempering methodologies for their effectiveness in warm conditions, and identify the critical mistakes related to heat and moisture that lead to failure. The objective is to equip you with the knowledge to achieve professional results by controlling the material, not the room.
Summary: Mastering Chocolate Tempering in Adverse Conditions
- Why Beta V Crystals Are Essential for the Snap?
- How to Temper Using the Seeding Method Without a Thermometer?
- Tabling vs Sous-Vide: Which Method is Foolproof for Beginners?
- The Moisture Mistake That Causes Gritty Sugar Bloom
- When to Re-Warm Tempered Chocolate: The 2-Degree Rule
- The Melting Mistake That Seizes Your $30 Bag of Chocolate
- How to Temper Chocolate Without a Marble Slab?
- Chocolatier vs Chocolate Maker: What Is the Real Difference?
Why Beta V Crystals Are Essential for the Snap?
The characteristic “snap,” glossy sheen, and smooth melt-in-the-mouth texture of high-quality chocolate are not accidental; they are the direct result of a specific molecular arrangement. Cocoa butter is a polymorphic fat, meaning it can solidify into multiple different crystal structures. In fact, scientific analysis shows that cocoa butter exhibits at least six different polymorphic structures, labeled Form I through Form VI. Each form possesses distinct physical properties, including melting point, density, and stability.
The goal of tempering is to exclusively promote the formation of Form V crystals (also known as Beta V). These are the most stable crystals that can be practically achieved in a kitchen setting. They are densely packed, which results in a firm, brittle chocolate that contracts slightly as it cools, making it easy to release from molds. Their melting point is approximately 33.8°C (92.8°F), just below human body temperature, which is why a well-tempered chocolate bar melts pleasingly on the tongue, not in the hand. The other, less stable crystal forms (I-IV) are loosely packed, resulting in a soft, crumbly texture and a dull appearance known as fat bloom.
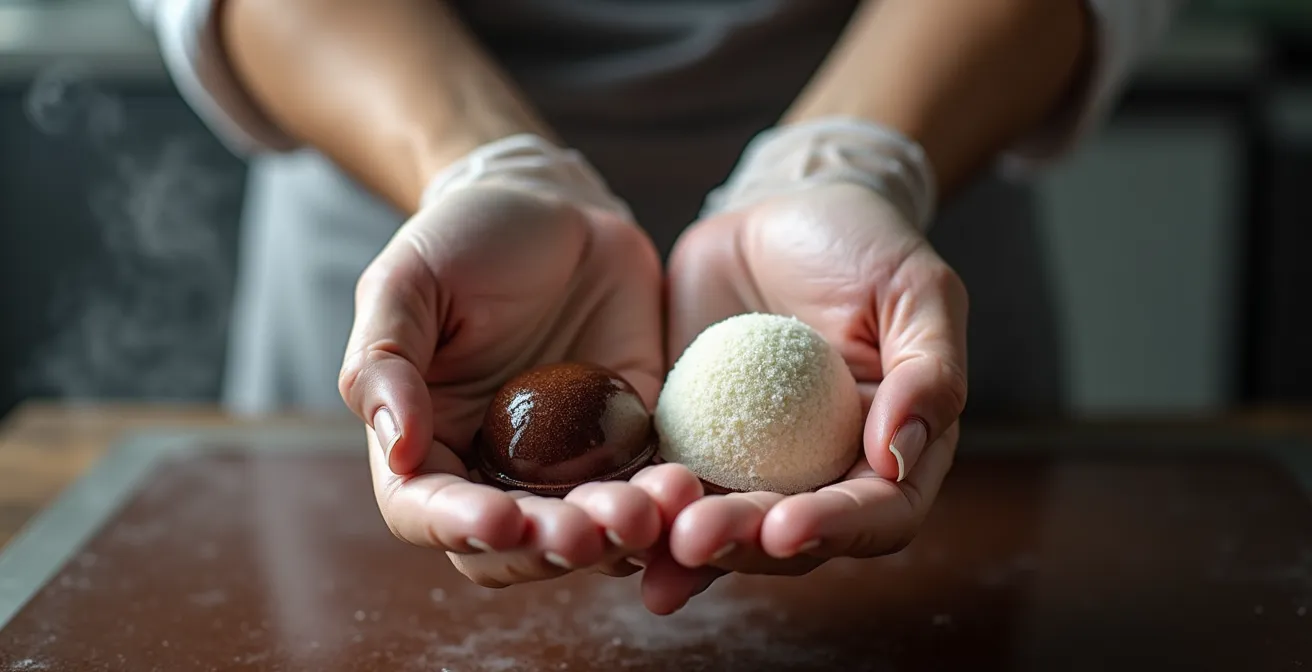
This image provides a conceptual visualization of the difference between the ordered, dense structure of properly tempered chocolate and the chaotic arrangement that leads to bloom.

Achieving this precise crystalline state is a game of temperature and agitation. First, you must melt the chocolate completely to dissolve all existing crystal structures. Then, you cool it to the crystallization temperature range where Beta V crystals can form, while agitating to create many small, uniform crystals. In a hot kitchen, controlling this cooling phase is the primary challenge, as the environment constantly works against your efforts to reach the target temperatures for nucleation.
How to Temper Using the Seeding Method Without a Thermometer?
In a hot kitchen, a thermometer can be deceptive. Radiant heat and fluctuating ambient temperatures can lead to inaccurate readings, causing you to miss the narrow crystallization window. A more reliable technique, especially for the seeding method, is to use a calibrated bio-sensor you always have with you: your lower lip. This method relies on tactile feedback rather than potentially flawed numerical data. The seeding method itself involves adding finely chopped, already tempered chocolate (the “seed”) into melted chocolate to encourage the formation of stable Beta-V crystals.
The process, as perfected by pastry chefs, bypasses the need for digital precision. As pastry cook Alexandra Whisnant explains in The Kitchn, this sensory approach is a core part of classical training:
Alexandra’s method for melting and tempering chocolate, which she learned at Le Cordon Bleu Paris and then perfected as a pastry cook at Chez Panisse, is unusual that it doesn’t rely on a thermometer. Instead, the chocolate’s temperature is tested by bringing the spatula to the area just below your bottom lip and dabbing on a small amount.
– Alexandra Whisnant, The Kitchn – Chocolate Tempering Guide
Your lower lip maintains a constant temperature of around 34-35°C (93-95°F). Since the target working temperature for dark chocolate is around 31-32°C (88-90°F), properly tempered chocolate should feel noticeably cool when dabbed on your lip. If it feels warm or neutral, the chocolate is still too hot and contains unstable crystals. If it feels cool, you have successfully entered the Beta V crystallization zone. You should also observe visual cues: the chocolate will fall in thicker, more defined ribbons from your spatula. Finally, perform a set test by dipping the tip of a knife into the chocolate. It should set with a satin sheen, not streaks, within 3 to 5 minutes at room temperature (around 20°C/68°F).
Tabling vs Sous-Vide: Which Method is Foolproof for Beginners?
When working in an uncontrolled, hot environment, the choice of tempering method has a profound impact on success. The two most discussed methods, tabling and sous-vide, represent opposite ends of the spectrum in terms of heat transfer and control. Tabling (or marbling) involves pouring melted chocolate onto a cool surface like marble and agitating it until it thickens. This relies on rapid cooling through conduction. Conversely, the sous-vide method involves placing chopped chocolate in a vacuum-sealed bag and immersing it in a water bath held at a precise temperature.
For a home chocolatier in a hot kitchen, the tabling method is exceptionally difficult. The “cool” marble slab will quickly absorb ambient heat, reducing its effectiveness and making it nearly impossible to bring the chocolate down to the target crystallization temperature of 27°C (81°F). It requires speed, a large working surface, and a consistently cool environment—three things the target user lacks. The sous-vide method, however, eliminates environmental variables. The water bath’s temperature is precisely controlled, ensuring the chocolate never overheats and can be held at the exact melting and working temperatures for extended periods. It is a slow but virtually foolproof process.
This table compares the primary tempering methods based on their suitability for a warm environment. Notice how methods that offer precise temperature holding and minimize exposure to ambient air are rated highest.
| Method | Heat Transfer | Temperature Control | Best For Hot Kitchens |
|---|---|---|---|
| Tabling/Marble | Rapid conduction cooling | Manual monitoring | Poor – marble heats up quickly |
| Seeding | Gradual crystallization | Moderate precision | Good – controlled environment |
| Sous-Vide | Precise water bath | Exact temperature holding | Excellent – eliminates variables |
| Ice Bath Seeding | Controlled bursts of cooling | Manual but effective | Excellent – counters ambient heat |
While sous-vide offers the most control, a hybrid approach called “ice bath seeding” is also highly effective. This involves placing the bowl of melted chocolate over another bowl filled with ice water for short bursts (5-10 seconds) while stirring constantly. This provides controlled cooling without the mess of tabling, directly countering the ambient heat. It offers a balance between the precision of sous-vide and the accessibility of the seeding method.
The Moisture Mistake That Causes Gritty Sugar Bloom
In a hot kitchen, the air is often humid, and this presents a danger as potent as excess heat: moisture. While fat bloom is caused by improper crystallization of cocoa butter, sugar bloom is caused by condensation. When the surface of the chocolate cools below the dew point of the surrounding air, moisture forms. This water dissolves some of the sugar in the chocolate. As the water evaporates, the sugar recrystallizes on the surface, leaving a gritty, white, or mottled appearance. The chocolate is still edible, but its texture is ruined.
Preventing sugar bloom requires a militant approach to moisture control. According to experts at L’École du Grand Chocolat Valrhona, the ideal environment for working with chocolate is a room temperature of 18-20°C (64-68°F) and low humidity. While achieving this temperature may be impossible, controlling humidity is not. The first step is to recognize that the ideal humidity for working with chocolate is between 50-65%; anything higher dramatically increases the risk of sugar bloom. A simple digital hygrometer can help you monitor this.
This image starkly contrasts the perfect, glossy surface of well-handled chocolate with the disastrous effects of sugar bloom caused by humidity.
To combat high humidity, you must create a “dry zone” for your chocolate work. This means ensuring all bowls, spatulas, and molds are bone-dry. Even a single drop of water can cause a portion of your chocolate to “seize.” Avoid working near a boiling kettle or dishwasher. If you are chilling your chocolates in the refrigerator, a common practice in hot kitchens, you must prevent condensation. Place the finished chocolates in an airtight container *before* refrigerating, and allow the sealed container to return to room temperature completely *before* opening it. This traps the condensation on the outside of the container, not on your chocolate.
Your 5-Step Humidity Control Checklist: Preventing Sugar Bloom
- Use a dehumidifier or air conditioning to keep the work environment stable, ideally below 65% humidity.
- Establish your workspace in a well-ventilated area, far from any sources of steam like stovetops or kettles.
- Thoroughly inspect and dry all tools, bowls, and molds before they come into contact with the chocolate.
- Slightly warm your molds in an oven set to its lowest temperature (around 38°C/100°F) to prevent condensation from forming on a cold surface.
- Always bring finished, refrigerated chocolates back to room temperature while still inside a sealed, airtight container to protect them from surface moisture.
When to Re-Warm Tempered Chocolate: The 2-Degree Rule
Once you have successfully achieved temper, the battle is not over. The chocolate must be maintained within a very specific temperature range to remain usable. If it cools too much, the Beta V crystals will multiply too rapidly, causing the chocolate to become thick, sludgy, and impossible to work with. This is known as over-crystallization. If it gets too warm, you risk melting the fragile Beta V crystals, losing the temper entirely. For dark chocolate, this delicate balance is critical. Data shows that properly tempered dark chocolate maintains its working temperature between 87°F to 91°F (30°C to 32°C). This is a narrow 2-degree Celsius (4°F) window.
This is where the “2-Degree Rule” becomes essential: you must be prepared to gently add heat the moment your chocolate drops below its optimal working range. In a hot kitchen, your chocolate may cool slower, but it *will* still cool. The key is to apply heat in a controlled manner that doesn’t shock the chocolate and destroy the temper. The worst method is placing the bowl back over hot water, as the steam creates a high risk of seizing and the heat is too aggressive.
A far better approach is to use a gentle, dry heat source. A brief, 2-3 second blast from a heat gun or hairdryer (on a low setting) while stirring constantly is a common professional technique. This introduces just enough energy to melt some of the excess crystals and restore fluidity without raising the overall temperature out of the working zone. An even safer method is to place the bowl on a standard heating pad set to low.
The following table evaluates common methods for maintaining chocolate temperature, highlighting the critical balance between stability and the risk of introducing moisture.
| Method | Temperature Stability | Condensation Risk | Professional Rating |
|---|---|---|---|
| Chocolate Warmer | Excellent | None | 5/5 |
| Heating Pad | Good | None | 4/5 |
| Heat Gun | Variable | None | 3/5 |
| Bowl Over Warm Water | Moderate | Very High | 2/5 |
The goal is to keep the chocolate in a state of dynamic equilibrium, where crystals are melting and reforming at a steady rate. A quick stir and a gentle pulse of heat every few minutes will keep your chocolate perfectly fluid and workable for an extended period, even as the ambient temperature works against you.
The Melting Mistake That Seizes Your $30 Bag of Chocolate
There is perhaps no more disheartening moment in chocolate work than watching a smooth, glossy pool of melted chocolate instantly transform into a thick, grainy, unusable mass. This phenomenon is called “seizing,” and it is the result of a catastrophic error in handling. Seizing is not one problem, but two, with distinct causes and outcomes: moisture-induced seizing and heat-induced seizing.
Moisture-induced seizing is the most common. Chocolate is an emulsion of cocoa solids and sugar suspended in cocoa butter fat. When even a tiny amount of water is introduced—from a wet spatula, steam, or a double boiler mishap—it causes the sugar and cocoa solids to clump together, breaking the emulsion. The fat separates, and the mixture becomes a stiff, pasty sludge. Counterintuitively, the way to fix this is to add *more* liquid. A small amount of boiling water, cream, or melted butter, stirred in vigorously, can dissolve the clumps and turn the seized mass into a usable (though no longer temper-able) chocolate sauce or ganache.
Heat-induced seizing is more final. This occurs when chocolate is scorched. The sugar crystals burn and the proteins denature, creating a thick, acrid-smelling paste. This typically happens when melting chocolate over direct heat or in a microwave on high power for too long. For dark chocolate, temperatures should never exceed 120°F (49°C), and for milk or white chocolate, the limit is even lower, around 110°F (43°C). Unlike moisture-seized chocolate, burnt chocolate cannot be salvaged. It must be discarded. The best prevention is to melt chocolate slowly, off the heat in a bowl set over warm (not simmering) water, or in a microwave at 50% power in 30-second intervals, stirring between each.
Triage Guide for Seized Chocolate
When faced with seized chocolate, a quick diagnosis is key. If the cause was a drop of water, the chocolate can be repurposed. Add liquid (boiling water or oil) by the teaspoon, stirring vigorously, until a smooth sauce forms. This can be used for icing, hot chocolate, or as a baking ingredient where temper is not required. However, if the chocolate smells burnt and is excessively thick, it has been heat-seized. Unfortunately, this chocolate is beyond recovery and must be thrown away to avoid imparting a burnt flavor to any dish.
How to Temper Chocolate Without a Marble Slab?
The image of a chocolatier gracefully working molten chocolate on a large marble slab is iconic, but it is a tool of luxury, not necessity. The purpose of the slab is to act as a heat sink, rapidly and evenly pulling thermal energy out of the chocolate through conduction. Marble and granite are effective because they have high thermal conductivity and thermal mass. However, in a hot kitchen, this can be a disadvantage, as the slab will also efficiently absorb heat from the room, quickly becoming too warm to be useful.
Fortunately, several accessible alternatives leverage the same physical principles. The most effective method for a home kitchen is the two-bowl method, which gives you precise control over the rate of cooling. After melting your chocolate in one bowl, you pour about two-thirds of it into a second, cool bowl. You stir the chocolate in the second bowl constantly, allowing it to cool via convection into the surrounding air and conduction into the bowl itself. You can accelerate this process by placing the bowl in an ice bath for very short intervals. Once this portion has thickened and cooled to around 27°C (81°F), you add it back to the remaining one-third of warm, melted chocolate to “seed” the batch with stable crystals, bringing the entire mixture into temper.
Case Study: The Two-Bowl Cooling Method
A practical application of this method involves adding a fresh chunk of already tempered chocolate to the pool when it reaches around 38°C (100°F). This technique, known as seeding, serves a dual purpose: it cools the mixture more quickly while simultaneously providing the crucial Beta-V crystal nuclei needed for proper tempering. For even faster cooling in a warm environment, the chocolatier can step into a cooler space, like a pantry or cellar, while continuously stirring the chocolate. This combination of seeding and a slightly cooler micro-environment can effectively accelerate the cooling phase, compensating for the lack of a marble slab.
Other surfaces can also be used if they are clean, non-porous, and cool. A large, heavy-duty stainless steel baking sheet (placed on a cool counter) can work, although its lower thermal mass means it will warm up faster than marble. A large ceramic platter can also serve in a pinch. The key is constant motion and observation, watching for the moment the chocolate begins to thicken and form “traces” as it drips from the spatula. This visual cue indicates that crystallization has begun and it’s time to combine it with the reserved warm chocolate.
Key Takeaways
- The success of tempering is a function of controlling molecular structure (polymorphism), not just temperature.
- Humidity is as detrimental as excess heat, causing sugar bloom through surface condensation.
- The quality of your starting material—specifically, the cocoa butter percentage—directly influences the ease and success of crystallization.
Chocolatier vs Chocolate Maker: What Is the Real Difference?
To fully master tempering, it is essential to understand the distinction between a “chocolate maker” and a “chocolatier,” as this difference dictates the very nature of the material you are working with. A chocolate maker is a craftsperson who transforms raw cacao beans into chocolate. Their process involves roasting, grinding, conching, and refining beans to create chocolate bars “from the bean.” A chocolatier, on the other hand, typically does not make chocolate from scratch. They are an artist who uses pre-made chocolate, known as couverture, as their medium to create confections like bonbons, truffles, and enrobed treats.
This distinction is critical because the chocolate used by each is fundamentally different. Chocolatiers almost exclusively use couverture chocolate. As legendary pastry chef Frédéric Bau of L’École Valrhona states, this material is engineered for their work:
Couverture chocolate, used by chocolatiers, is designed with a higher percentage of cocoa butter and specific fluidity, making it easier to re-crystallize successfully
– Frédéric Bau, L’École Valrhona – The Encyclopedia of Chocolate
This higher percentage of cocoa butter is the key. While standard eating chocolate might have 20-30% cocoa butter, professional couverture chocolate contains between 31-39% cocoa butter. This extra fat content creates a more fluid chocolate when melted, making it easier to work with for dipping and molding. More importantly, the greater concentration of cocoa butter provides more molecules available to form the stable Beta V crystal lattice, increasing the probability of a successful temper. For a home chocolatier struggling in a hot kitchen, starting with high-quality couverture chocolate is not a luxury; it is a strategic decision that significantly improves your odds of success by providing a material chemically optimized for crystallization.
By focusing on the molecular science of crystallization, managing humidity, and selecting the right material, you can consistently achieve professional-grade tempered chocolate. The kitchen’s temperature becomes a secondary factor, not an insurmountable obstacle. To begin putting these principles into practice, the next logical step is to source high-quality couverture chocolate and a reliable digital hygrometer.