
The world of recipes and pastries represents a fascinating intersection of science, artistry, and precision. Whether you’re attempting your first homemade gelato or perfecting a mirror glaze, understanding the fundamental principles behind texture, temperature, and timing transforms baking from guesswork into confident creation. Every fold, every degree of heat, and every minute of resting time contributes to the final result on your plate.
This resource explores the core techniques that separate professional-quality pastries from disappointing attempts. From the molecular behavior of fat globules in frozen desserts to the physics of heat transfer in molten chocolate cakes, you’ll discover why certain methods work and how to troubleshoot common failures. These insights empower you to adapt recipes, recognize problems before they occur, and achieve consistently excellent results in your own kitchen.
Texture defines the eating experience of any pastry or dessert. The satisfying crack of a properly tempered chocolate shell, the cloud-like softness of a mousse, or the creamy smoothness of gelato all depend on understanding how ingredients interact at a structural level.
Fat serves as both a flavor carrier and texture modifier. In frozen desserts like gelato, fat content typically ranges from 4-8%, significantly lower than American ice cream’s 14-18%. This difference isn’t merely numerical—it fundamentally changes how flavors release on your palate. Lower fat content allows fruit and nut flavors to express themselves more directly, while higher fat creates a coating effect that delivers richness and slows flavor perception.
The size and distribution of fat globules also matter tremendously. When properly emulsified, microscopic fat particles create smoothness. When the emulsion breaks—often due to temperature fluctuations or improper mixing—you experience graininess or separation. Understanding this principle helps you recognize why some recipes insist on specific mixing speeds or temperature ranges.
Moisture absorption determines success in layered desserts. Classic preparations like tiramisu depend on precise liquid-to-biscuit ratios to achieve the signature texture—neither soggy nor dry. Different biscuits absorb at different rates: ladyfingers absorb quickly due to their high surface area and airy structure, while denser sponge cakes require longer soaking times.
The soaking liquid’s composition also influences absorption. Coffee-based liquids penetrate differently than sugar syrups or liqueurs, each affecting the final moisture distribution and structural integrity. Recognizing over-saturation before assembly—when biscuits begin to lose their shape or feel heavy—prevents the disappointment of a collapsed dessert hours later.
Creating frozen desserts at home demands understanding principles that professional equipment handles automatically. Home machines lack the powerful motors and rapid freezing capabilities of commercial churners, but knowledge bridges this gap effectively.
Sugar doesn’t just sweeten—it controls ice crystal formation by lowering the freezing point of your base. This is why simply reducing sugar in recipes leads to rock-hard results. The sugar-to-liquid ratio determines whether your frozen dessert scoops smoothly or requires an ice pick. Too much sugar, however, prevents proper freezing altogether, leaving you with a sweet slush.
Different sugars behave differently: granulated sugar provides structure, while glucose or inverted sugars create softer textures and resist crystallization. Professional pastry chefs often combine multiple sugar types to achieve specific textural goals.
Adding coffee flavor without diluting your base requires technique. Espresso powder or concentrated cold brew maintains the proper water balance while delivering intense flavor. Chocolate presents different challenges depending on format—melted chocolate must be tempered to prevent seizing, while chocolate chips need sizing and timing considerations to avoid becoming tooth-breaking nuggets.
The churning process itself requires attention. Over-churning introduces excessive air (creating icy, brittle texture) or, paradoxically, can cause butter formation if you’re working with high-fat dairy bases. Stopping churning at the soft-serve consistency stage, then allowing proper hardening time in the freezer, produces optimal results.
The fat globule structure in cream undergoes transformation during freezing. Proper whipping technique aerates the base without breaking the emulsion—a delicate balance. Home cooks can employ stabilizers like cornstarch, egg yolks, or commercial stabilizers to maintain smoothness during temperature fluctuations. Each stabilizer functions differently:
Preventing freezer burn requires proper storage—airtight containers with plastic wrap pressed directly against the surface eliminate air exposure. If you notice ice crystals forming on the surface, you’re observing moisture migration, which degrades texture over time.
The foundation of any tart determines whether your creation impresses or disappoints. Soggy bottoms, tough textures, and shrinking crusts all trace back to fundamental technique errors that proper understanding prevents.
Gluten forms when flour proteins encounter water and receive mechanical action through mixing or kneading. For tender pastry, minimizing gluten development is essential. This explains why recipes emphasize cold ingredients, minimal handling, and resting periods. Each manipulation strengthens gluten networks, transforming delicate pastry into tough, breadlike crust.
The fraisage technique—smearing dough against your work surface with the heel of your hand—represents a controlled gluten development method. This French technique creates flaky layers while maintaining tenderness, but requires practice to avoid overworking.
Rolling surfaces significantly impact results. Marble stays naturally cool, preventing butter from softening during rolling. Silicone mats provide non-stick convenience but can warm dough through friction. Lightly floured wooden surfaces offer traditional control but require more added flour, which can toughen dough.
Resting periods serve multiple functions. Initial chilling after mixing allows flour hydration to complete and gluten strands to relax. Post-rolling refrigeration before baking prevents shrinkage by allowing the gluten network to settle. Skipping these rest periods—even when rushed—almost guarantees inferior results.
Achieving lightness in mousses, soufflés, and whipped preparations depends entirely on understanding protein foam structures and how to preserve them through assembly.
When you whip egg whites or cream, you’re creating a foam—a matrix of protein or fat molecules surrounding air bubbles. The protein structure in egg whites unfolds during whipping, forming networks that trap air. These structures are remarkably delicate; a single drop of fat can prevent proper foam formation by interfering with protein bonding.
Cream behaves differently. Fat percentage determines whipping success—heavy cream with 36-40% fat whips reliably, while lighter creams lack sufficient fat globules to create stable structure. Ultra-pasteurized cream whips poorly because high-heat processing damages proteins.
Incorporating heavier ingredients into delicate foams requires the folding technique. The goal is preserving maximum air while achieving even distribution. Cut vertically through the center of your mixture, sweep across the bottom, and lift up the side—a motion resembling the letter “J.” Rotate the bowl and repeat until just combined.
Knowing when to stop separates experienced bakers from beginners. A few streaks of unmixed ingredient are preferable to overmixing, which collapses air cells you’ve carefully created. Each unnecessary fold expels precious air.
Temperature shock destroys delicate structures. Adding hot melted chocolate directly to whipped cream causes immediate deflation and potential curdling. Professional techniques involve tempering—gradually raising the temperature of the cold component by mixing in small amounts of the hot ingredient first, then combining everything together. This principle applies across countless preparations, from making custards to folding meringues.
Some pastries demand split-second timing and exact temperatures. Molten lava cakes epitomize this challenge—the difference between liquid centers and fully baked cakes often comes down to 30-60 seconds.
Heat moves from your oven’s air to the pan, then through the batter from outside toward the center. The thermal conductivity of your pan matters enormously. Dark metal pans absorb heat aggressively, cooking faster and darker. Glass conducts heat slowly but retains it longer. Individual ramekins cook differently than a single large pan due to surface-area-to-volume ratios.
Batter composition also affects cooking time. Higher fat content slows heat penetration. More eggs create structure that sets at specific temperatures. Understanding these variables helps you adapt recipes to different equipment or altitudes.
Properly preparing molds ensures clean release—the tragedy of a perfect lava cake stuck in its ramekin defeats the entire effort. Butter must coat every surface, followed by cocoa powder (not flour, which creates pale, unappealing spots on chocolate cakes). Refrigerating prepared molds sets the coating firmly.
Flour type affects both structure and timing. Cake flour’s lower protein content creates tenderness and slightly longer cooking times. All-purpose flour provides more structure, useful if you prefer less liquid centers. Bread flour would be catastrophically wrong—too much gluten for delicate cake structure.
The final layer of glaze or the last decorative element often distinguishes home attempts from professional presentations. Mirror glazes exemplify techniques that seem magical but follow clear scientific principles.
Mirror glaze relies on precise gelatin ratios and temperature control. The condensation factor presents the primary challenge—pouring warm glaze onto frozen desserts causes immediate moisture formation, creating dull spots or cloudy patches. Professional pastry chefs ensure base desserts are completely frozen (ideally -18°C/0°F) and work quickly in cool environments.
Air bubbles ruin the mirror effect. After preparing glaze, allowing it to rest while occasionally stirring releases trapped air. Straining through fine mesh catches remaining bubbles. Pouring technique matters too—pouring from the optimal height of 15-20 cm (6-8 inches) allows glaze to flow smoothly without incorporating air or creating pressure that moves the dessert.
Gelatin bloom strength (measured in degrees) determines setting power. Higher bloom numbers create firmer gels with less gelatin. Sheet gelatin (common in European recipes) and powdered gelatin (common in American recipes) require different handling but achieve similar results when properly converted.
The spiderweb effect—fine lines appearing across your glaze—results from temperature issues. If glaze cools too much before pouring, it begins setting, creating viscosity that prevents smooth flow. The ideal pouring temperature sits around 30-35°C (86-95°F)—warm enough to flow freely but cool enough not to melt the frozen dessert beneath.
Mastering recipes and pastries transforms from intimidating to achievable when you understand the principles underlying each technique. Temperature, timing, ingredient ratios, and mechanical processes all follow logical patterns. Every failure teaches recognition—over-mixed batter, under-whipped cream, or insufficient chilling time become obvious in retrospect. With this foundation, you can confidently explore advanced preparations, troubleshoot problems independently, and develop the intuition that characterizes experienced bakers. The precision required isn’t about perfection but about understanding why each step matters and what each ingredient contributes to your final creation.
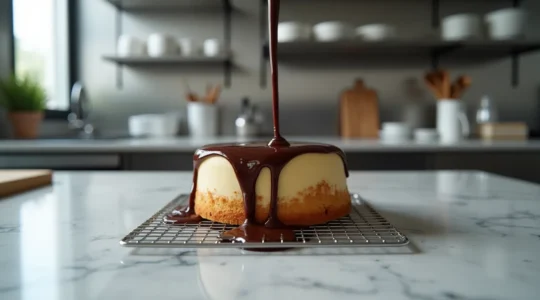
The secret to a flawless mirror glaze isn’t one magic temperature; it’s mastering the precise physics of temperature, texture, and application. A matte finish is caused by uncontrolled factors like condensation, air bubbles, and improper glaze viscosity. The shine comes…
Read more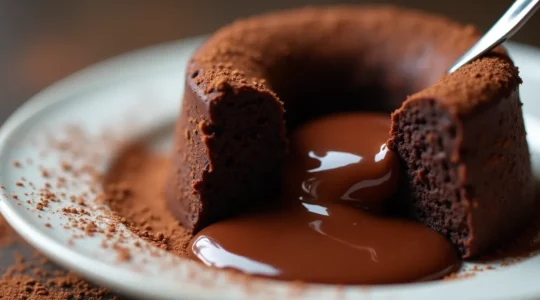
The secret to a perfect molten lava cake isn’t nervously watching the oven; it’s building a thermal ‘failsafe’ into the cake *before* it bakes. Create a frozen ganache core to act as a thermal buffer, ensuring the center melts while…
Read more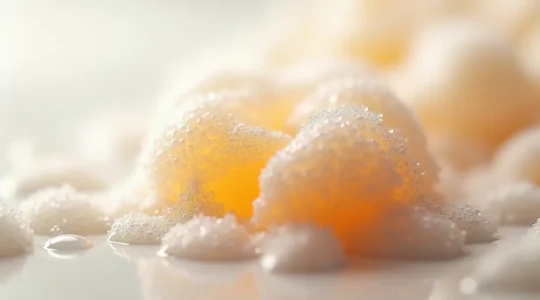
The ideal mousse stabilizer isn’t about gelatin versus egg whites; it’s a strategic choice in molecular architecture to achieve a specific textural goal. Egg whites create a delicate, fine-bubbled foam through protein denaturation, but this structure is highly vulnerable to…
Read more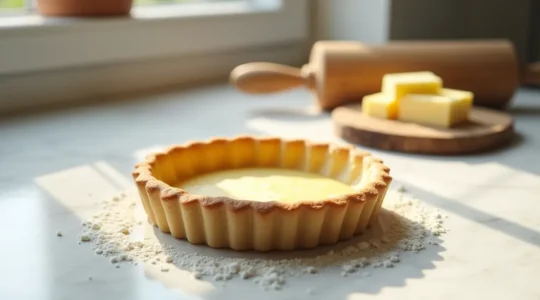
In summary: Pastry shrinkage is a predictable failure of technique, primarily caused by an overdeveloped gluten network and improperly managed fat temperature. The key is to keep the dough cold at all stages to ensure the butter remains solid, creating…
Read more
The grainy, separated, or icy texture in your homemade semifreddo isn’t a recipe failure; it’s a breakdown of the dairy emulsion at a microscopic level. The primary cause of separation is an unstable network of fat globules that fails to…
Read more
Achieving a professionally smooth coffee ice cream texture at home requires mastering food science, not just following a recipe. Ice crystals are controlled by managing “freezing point depression” with specific sugar blends, not just total sugar. Infusing flavor via steeping…
Read more
Your tiramisu fails because you treat it like baking. It is structural engineering. The disintegration of your dessert is a predictable structural failure, not bad luck. The porous, fat-free structure of Savoiardi biscuits absorbs liquid with extreme speed, a process…
Read more
The secret to a sliceable tiramisu that lasts 24 hours isn’t a recipe; it’s mastering the dessert’s architecture by controlling temperature and fat. High-fat mascarpone is non-negotiable as its fat crystals form the dessert’s structural “cement” during chilling. A minimum…
Read more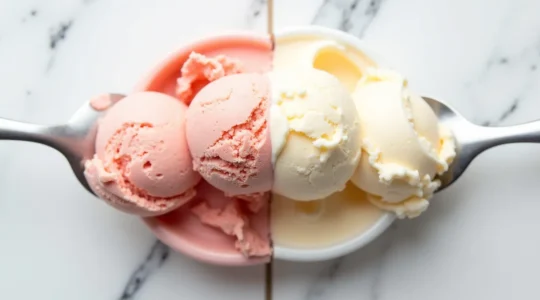
Contrary to popular belief, gelato’s superior creaminess and intense flavor aren’t a mystery—they are the direct result of a meticulous craft that intentionally uses less fat and less air than ice cream. Gelato’s density, achieved through slower churning, delivers more…
Read more