
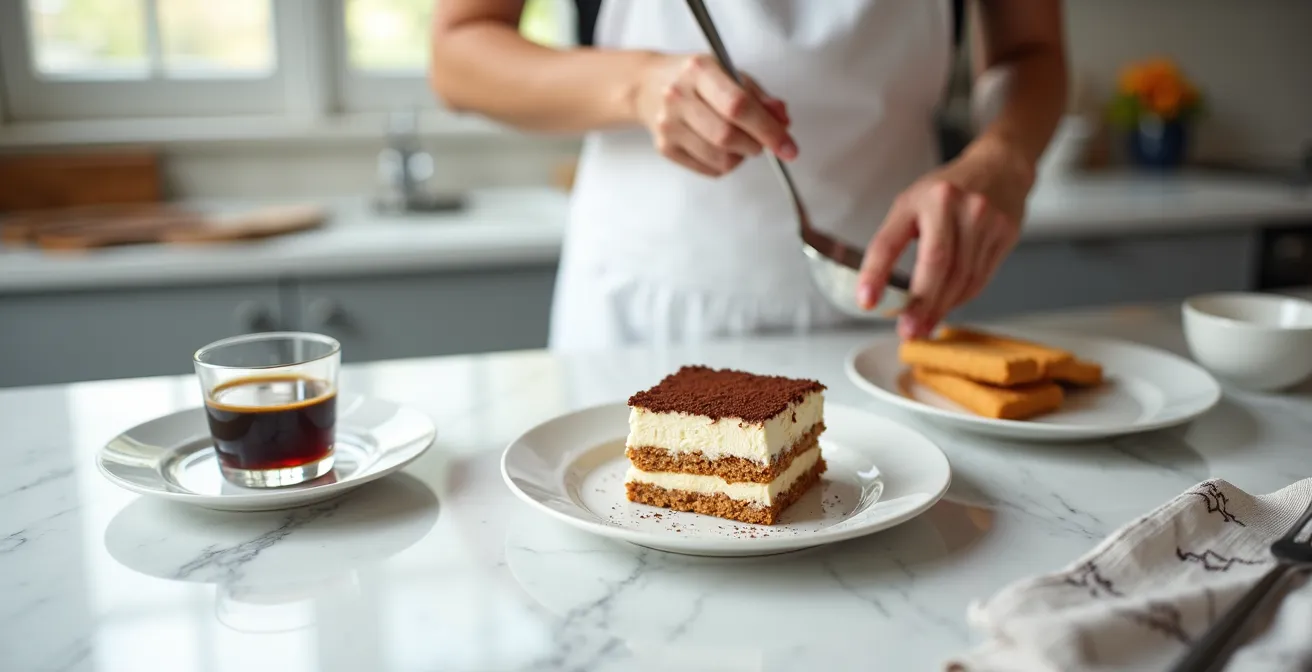
Your tiramisu fails because you treat it like baking. It is structural engineering. The disintegration of your dessert is a predictable structural failure, not bad luck.
- The porous, fat-free structure of Savoiardi biscuits absorbs liquid with extreme speed, a process governed by temperature.
- A precise, one-second dip and a visual cross-section check are the only non-negotiable methods for ensuring correct saturation.
Recommendation: Abandon guesswork. Use a shallow dish, room-temperature espresso, and a timer. Control every variable to build a dessert that holds its form.
You know the feeling. The pride of assembling a beautiful tiramisu, followed by the horror of serving a soupy, collapsing mess. You followed the recipe. You were told to “dip quickly” and “not oversaturate,” yet the result was a dessert with the structural integrity of a wet paper towel. That frustration ends today. The vague advice you have been given is the root of the problem. It encourages a level of artistic interpretation that this dessert does not permit.
The common wisdom to “use cold coffee” or “just be fast” is insufficient because it ignores the fundamental science of the key component: the Savoiardi biscuit. This is not a simple sponge cake. Its unique composition makes it an extraordinarily effective vessel for liquid, but also one that is prone to catastrophic failure if mishandled. Mastering tiramisu is not about developing a “feel” for it; it is about understanding and controlling the physics of absorption.
This guide will correct your technique by deconstructing the process into a series of non-negotiable principles. We will move beyond culinary folklore and into the realm of precision. You will learn to analyze the biscuit’s structure, control the variables of time and temperature, and execute a layering technique that guarantees a stable, perfectly textured result every single time. Forget what you think you know. Class is in session.
To master this dessert, we will dissect each critical stage of the process, from understanding the materials to the final assembly. This structured approach will provide the precise knowledge needed to engineer a perfect tiramisu.
Summary: Engineering a Flawless Tiramisu
- Why Savoiardi Absorb Liquid Differently Than Sponge Cake?
- How to Dip Ladyfingers in Espresso: The 1-Second Rule?
- Hot Espresso vs Cold Coffee: Which Soaks into the Biscuit Better?
- The Visual Sign That Your Ladyfingers Are Too Wet to Use
- How to Save a Soggy Tiramisu Before Serving It to Guests?
- How to Spread Cream on Soaked Ladyfingers Without Mixing Layers?
- How to Pour Water to Ensure Even Saturation of Grounds?
- How to Layer Tiramisu So It Holds Its Shape for 24 Hours?
Why Savoiardi Absorb Liquid Differently Than Sponge Cake?
Your first mistake is assuming a ladyfinger is just a dry piece of cake. It is not. The Savoiardi biscuit is an engineered sponge, and you must understand its architecture to control it. Unlike a standard sponge cake, its structure is optimized for rapid absorption, which is both its greatest strength and its most catastrophic weakness. There are three key structural differences you must comprehend.
First is the egg-to-flour ratio. A typical ladyfinger recipe uses a high proportion of eggs to a small amount of flour, creating a protein-rich network full of air pockets. This results in an extremely porous, open-celled structure that actively draws liquid in through capillary action. Second, and most critically, is the lack of fat. Savoiardi contain zero butter or oil. Fat repels liquid; its absence means there are no hydrophobic barriers to slow down moisture penetration. Liquid enters the biscuit’s structure unimpeded.
Finally, the crisp, crystallized sugar exterior provides a moment of false security. This coating creates a temporary barrier that lasts for a second at most before the liquid breaches it and begins its rapid invasion of the interior. Some bakers find that homemade versions can be too firm if slightly over-baked, which demonstrates how even small deviations from the ideal structure can dramatically alter the biscuit’s absorption capacity and throw off your timing.
How to Dip Ladyfingers in Espresso: The 1-Second Rule?
Forget the ambiguous instruction to “dip quickly.” We operate with precision. The standard is the 1-second rule: one second per side, and not a fraction more. This requires a correct setup and a methodical approach, not a frantic, uncontrolled dunking. Your objective is to achieve a specific saturation gradient—a moist, flavorful exterior with a firm, structurally sound core. Anything else is a failure.
To execute this correctly, you must follow a strict procedure. Pour your cooled espresso into a wide, shallow dish, such as a pie plate. This is not for aesthetic reasons; it ensures the ladyfinger can lie flat for a controlled, even dip. Do not use a deep mug. Before you begin your main batch, you will test one “sacrificial” ladyfinger. Dip it for one second, wait five seconds for the liquid to settle, and then break it in half. The cross-section is your data. It must show a dark, saturated outer ring with a distinct, pale center. That is the goal.
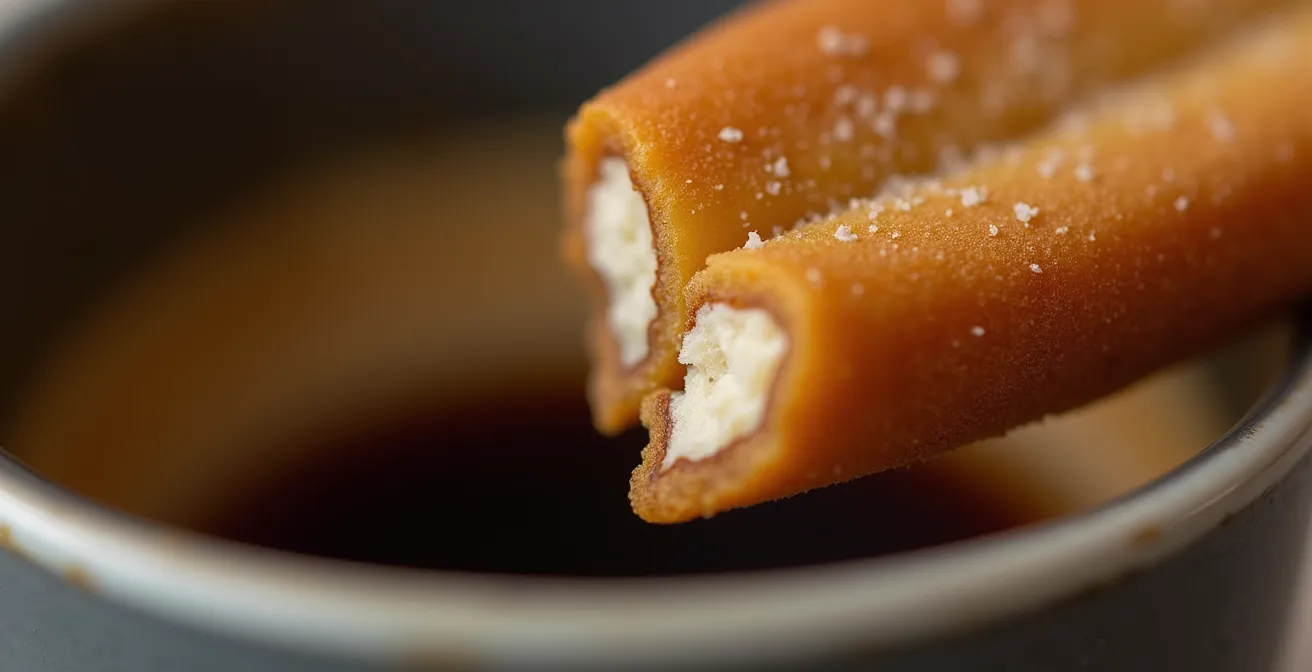
When dipping, use the “flat dip” method. Submerge one flat side for one second, flip it immediately, and submerge the other side for one second. After dipping, hold the biscuit vertically for two seconds. If any coffee drips from the bottom, it is oversaturated and must be discarded. For those who lack the required dexterity, the only acceptable alternative is to apply the coffee with a pastry brush for absolute control.
Hot Espresso vs Cold Coffee: Which Soaks into the Biscuit Better?
The temperature of your espresso is not a matter of preference; it is a variable that directly controls the rate of absorption. Using liquid that is too hot is a common and amateur mistake. Hot liquids have lower viscosity and higher molecular energy, causing them to penetrate the porous structure of the ladyfinger almost instantaneously. This gives you zero margin for error and is the fastest path to a soggy, disintegrating base.
Conversely, using ice-cold coffee slows absorption significantly. While this provides a much safer margin for error, making it suitable for absolute beginners, it comes at a cost. Cold liquid is less effective at extracting and carrying the full-bodied flavor of the espresso, resulting in a less aromatic final product. Your goal is to find the optimal balance between control and flavor infusion.
The professional compromise is to use espresso that is lukewarm or at room temperature. This provides the ideal balance, allowing for rapid-enough absorption to infuse flavor without being so aggressive that the biscuit’s structural integrity is immediately compromised. The following table codifies the relationship between temperature and risk, which you are required to understand.
This comparative analysis, confirmed by a recent breakdown of temperature impacts, shows there is a clear sweet spot for balancing control and flavor.
| Temperature | Absorption Speed | Risk Level | Flavor Intensity | Best For |
|---|---|---|---|---|
| Hot (160°F+) | Very Fast | High Risk | Maximum | Experienced bakers |
| Lukewarm (100°F) | Moderate | Low Risk | Best compromise | |
| Cold (40°F) | Slow | Very Safe | Mild | Beginners |
The Visual Sign That Your Ladyfingers Are Too Wet to Use
You cannot rely on hope. You must diagnose the state of your ladyfingers with objective visual and structural tests. A correctly saturated biscuit has specific characteristics, while an oversaturated one will clearly signal its impending failure. As culinary authority Ina Garten notes, the line between flavor and sogginess is thin, and visual confirmation is your only reliable guide.
According to Garten, if you dip your ladyfingers for too long, they will turn soggy. However, if you don’t dip them for long enough, they won’t absorb the proper flavor.
– Ina Garten, Food Network demonstration
There are three mandatory tests you must perform to verify proper saturation. The most important is the Cross-Section Check. As established with your sacrificial biscuit, a properly soaked ladyfinger broken in half will reveal a dark, moist exterior with a distinct, pale yellow line running through the center. A biscuit that is uniformly dark throughout is a failure and will collapse.
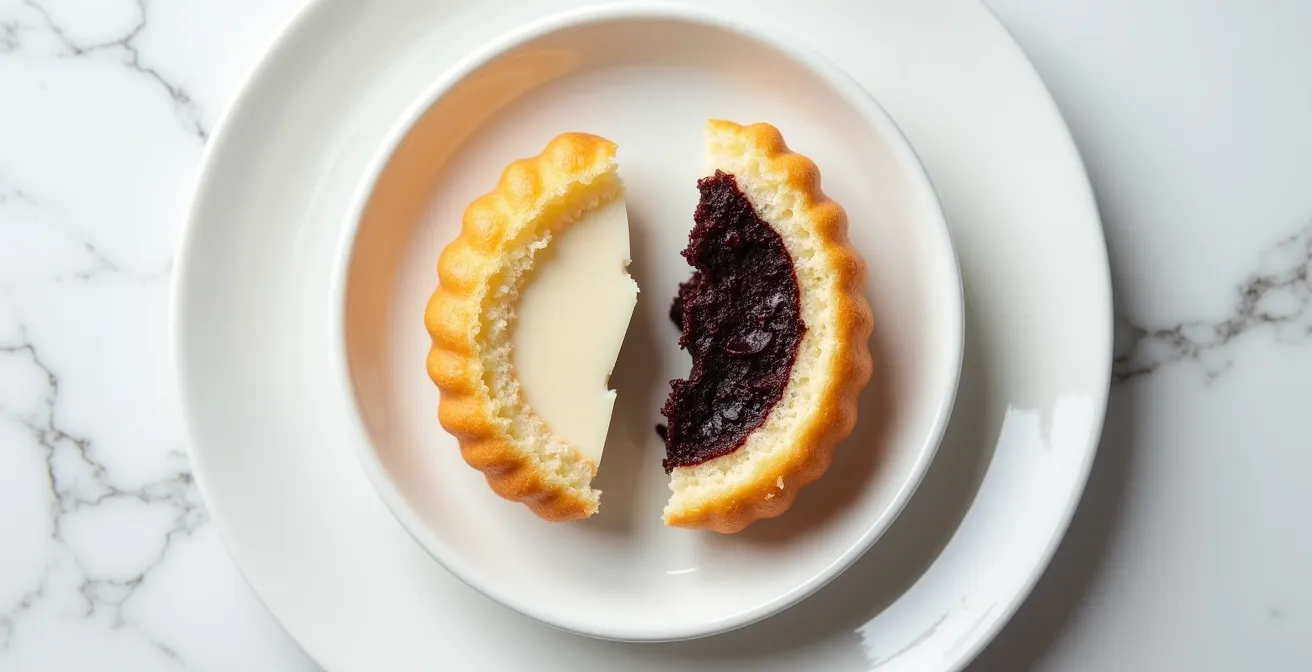
The second is the Gravity Drip Test. After dipping, hold the ladyfinger vertically for two seconds. If even a single drop of espresso falls, the biscuit is oversaturated and must be rejected. The third is the Structural Test. Hold the biscuit horizontally from one end. A perfect ladyfinger will remain firm and straight. An oversaturated one will sag in the middle, indicating that its internal structure has already been compromised.
Your Pre-Assembly Audit: 5-Point Structural Check
- Dipping Station: Is the espresso in a shallow dish and at room temperature?
- Timing Control: Are you using a timer or a precise one-second count for each side?
- Cross-Section Verification: Did you break a test biscuit to confirm the pale center line is present?
- Gravity Check: Does each biscuit pass the two-second vertical hold test with zero dripping?
- Structural Integrity: Does each biscuit remain rigid when held horizontally, with no sagging?
How to Save a Soggy Tiramisu Before Serving It to Guests?
Let us assume you have failed the previous steps and are now facing a dessert with compromised structural integrity. While perfection is no longer attainable, there are tactical procedures to mitigate the disaster and make the result presentable. These are emergency measures, not standard practice.
The first and most effective technique is the Strategic Freeze. Place the entire tiramisu in the freezer for 30 to 45 minutes. Do not exceed this time, or you will create ice crystals that will ruin the texture upon thawing. This rapid chilling helps to solidify the excess liquid and firm up the mascarpone cream, temporarily reinforcing the base. This can buy you enough time to slice and serve before a total collapse. However, remember that tiramisu structure tests show a 24-36 hour maximum storage period even under ideal conditions; a compromised dessert has an even shorter lifespan.
If the structure is beyond saving, your only option is the Emergency Trifle Pivot. Abandon the idea of a clean slice. Instead, scoop the mixture into individual glass cups or goblets. Garnish elegantly and present it as “deconstructed tiramisu.” This reframes the failure as an intentional stylistic choice. Finally, for minor issues, you can attempt the Blotting Method. Carefully slide a thin, offset spatula along the bottom of the dish, creating a small channel. Gently tilt the dish to allow excess liquid to pool in a corner, and then carefully blot it away with a folded paper towel. This is a delicate operation with a low chance of success for significant oversaturation.
How to Spread Cream on Soaked Ladyfingers Without Mixing Layers?
You have perfectly soaked your ladyfingers. Do not ruin them with improper cream application. Spreading a dense cream over a delicate, saturated biscuit requires a specific technique to avoid tearing the surface and creating a muddy, indistinct mess. The goal is to create clean, defined layers. Brute force is your enemy; finesse is required.
First, ensure your mascarpone cream has the correct consistency. Professional bakers beat the mascarpone, cream, and sugar until stiff peaks form. If your cream is runny, it will bleed into the ladyfingers regardless of your technique. If the cream is too thin, chill it for at least 30 minutes before assembly to help it firm up. A thick, stable cream is a prerequisite for clean layers.
The superior method for application is using a piping bag. You do not need a decorative tip. Transfer the cream to a large piping bag and snip off the end. Pipe even mounds or a thick snake of cream across the ladyfinger layer in a grid pattern. This distributes the cream’s weight and minimizes the force needed for spreading. Then, use an offset spatula with minimal downward pressure to gently connect the mounds. Let the cream spread under its own weight rather than forcing it with the spatula. This ‘dollop and push’ technique—placing large dollops and gently pushing them outward—is the key to a pristine layer.
How to Pour Water to Ensure Even Saturation of Grounds?
While this principle is often applied to brewing coffee, we will apply its core concept to the tiramisu’s foundation. The “grounds” are your ladyfingers, and the “water” is your soaking liquid. Ensuring even saturation depends not only on technique but also on the properties of the liquid itself. The choice of liquid is a critical variable that affects both flavor and absorption rate.
Espresso is traditional for a reason: its high concentration and balanced acidity provide an intense, classic flavor. However, other liquids can be used, each with a different impact on the final structure. Cold brew, for example, is less acidic and can result in a smoother, less bitter flavor profile, but it must be at room temperature for dipping. Moka pot coffee offers an intensity similar to espresso but can sometimes carry a higher acidity.
The most significant variable is the introduction of alcohol. Many recipes call for Marsala wine, rum, or brandy. You must understand that this is not just a flavor addition. As a professional pastry manual on advanced tiramisu techniques confirms, adding alcohol can slightly increase the absorption speed due to its lower density and solvent properties. This means you must be even more disciplined with your one-second rule when alcohol is present. It reduces your margin for error.
| Liquid Type | Concentration | Acidity | Alcohol Effect | Best Application |
|---|---|---|---|---|
| Espresso | Very High | Medium | None | Traditional |
| Cold Brew | High | Low | None | Smooth flavor |
| Moka Pot | High | Medium-High | None | Intense flavor |
| With Rum/Marsala | Medium | Variable | Increases absorption | Adult version |
Key Takeaways
- The 1-Second Rule: Dipping is a timed, precise action, not an approximation. One second per side is the absolute maximum.
- Temperature is Control: Use lukewarm or room temperature espresso. Hot liquid guarantees structural failure; cold liquid mutes flavor.
- Curing is Not Optional: A minimum of 8 hours of refrigeration is required for moisture equalization and fat solidification, which are essential for a stable slice.
How to Layer Tiramisu So It Holds Its Shape for 24 Hours?
The final assembly is where all your disciplined work comes together to create long-term structural integrity. A tiramisu that holds its shape for 24 hours is not an accident; it is the result of a deliberate construction method. We will use the “bricklaying technique” to build a stable, resilient dessert.
Begin by applying a thin layer of mascarpone cream to the bottom of your dish. This is your “mortar” and it serves to anchor the first layer of ladyfingers, preventing them from sliding. Next, arrange your first layer of perfectly soaked biscuits snugly, ensuring there are no gaps. The orientation of the second layer is critical for stability. It must be laid perpendicular to the first layer. This cross-hatching creates a weave-like structure that distributes weight and resists shearing forces when you slice.
After your final layer of biscuits and cream, apply a thick “seal” of mascarpone over the entire surface to prevent it from drying out in the refrigerator. Now comes the most passively crucial step: curing. The tiramisu must be refrigerated for a minimum of 8 hours, but ideally longer. During this time, two processes occur: moisture equalization, where the dry cores of the biscuits slowly absorb ambient moisture from the cream to achieve a perfect, uniform texture; and fat solidification, where the fats in the mascarpone chill and harden, turning the cream into a firm, sliceable structure. As tiramisu curing studies reveal that 24-48 hours of refrigeration creates a far superior texture compared to just a few hours. Skipping this step is a guarantee of a soft, unstable dessert.
You now possess the fundamental principles of structure, temperature, and technique. The vague notions of the past have been replaced with a precise, engineering-based methodology. The next step is to execute these principles without deviation. Apply this discipline to your next dessert and observe the difference. Begin.