
The secret to a flawless mirror glaze isn’t one magic temperature; it’s mastering the precise physics of temperature, texture, and application.
- A matte finish is caused by uncontrolled factors like condensation, air bubbles, and improper glaze viscosity.
- The shine comes from a perfect emulsion and a rapid, clean set, which requires scientific precision at every step.
Recommendation: Stop guessing with temperature and start controlling the variables. Focus on the thermal shock between the cake and the glaze, the elasticity of your gelatin, and a bubble-free application.
You followed the recipe to the letter. You bought the best ingredients, you froze your entremet solid, and you poured the glaze with hope in your heart. But instead of the hypnotic, glass-like reflection you saw online, you’re left with a disappointing, dull, or even rubbery coating. It’s a common frustration that leads many aspiring pastry artists to believe a perfect mirror glaze is an unattainable form of magic.
The internet is full of generic advice: “get the temperature right” or “strain out the bubbles.” While not incorrect, this advice misses the fundamental point. A mirror shine is not about following a recipe; it’s about controlling a series of chemical and physical reactions. It’s about understanding the science of emulsions, the physics of viscosity, and the art of a flawless application. The problem isn’t your recipe; it’s the lack of process control.
But what if the key wasn’t a single “perfect” temperature, but rather a mastery of the *interactions* at every stage? This guide abandons vague tips for the precision of a finishing specialist. We will deconstruct the process, revealing how each step—from managing condensation on a molecular level to creating a shear flow with your blender—is a critical control point. We’re moving beyond what to do and explaining precisely *why* you do it, transforming your glaze from a gamble into a predictable, repeatable masterpiece.
For those who prefer a more visual and condensed format, the following video offers a fantastic summary of key pastry techniques that can elevate your creations.
To achieve this level of perfection, we will systematically address the critical points of failure. This guide is structured to build your expertise from the foundational principles to the final application, ensuring every element is under your control.
Summary: Mastering the Science of the Perfect Mirror Glaze
- Why Glazing a Frozen Cake is Essential for Shine?
- How to Use a Hand Blender Without Creating Foam?
- Gold vs Silver Gelatin: Which Elasticity prevents Cracking?
- The Temperature Mistake That Causes Glaze to Slide Off
- When to Stop Pouring: Saving Glaze for the Sides
- Why Fat Kills Egg White Foam Instantly?
- Why Edible Ink is Made of Sugar and Coloring?
- How Edible Printing Works and Is It Safe to Eat?
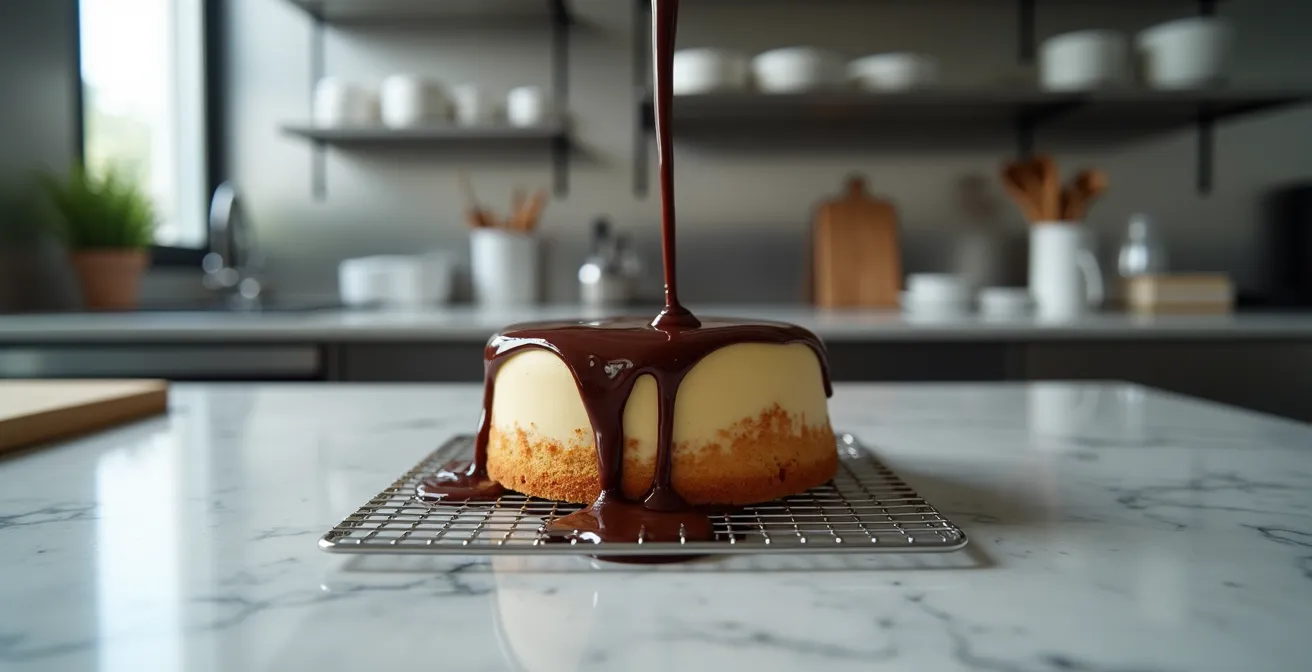
Why Glazing a Frozen Cake is Essential for Shine?
The most fundamental principle of a mirror glaze is the thermal shock. It’s the rapid temperature difference between the warm glaze and the frozen cake that causes the gelatin to set almost instantly into a thin, flawless layer. Without this shock, the glaze would remain liquid for too long, either soaking into the mousse or simply sliding off. The professional standard is exacting: the perfection of this set depends on a precise temperature differential. For a flawless finish, the goal is to have the cake at exactly -18°C while the glaze is at 35°C.
However, this temperature difference creates an immediate and formidable enemy: condensation. The moment your frozen cake leaves the freezer, the humidity in the air crystallizes on its surface, forming a microscopic layer of frost. Pouring a glaze onto this layer of water is like pouring it onto a slip-and-slide. The glaze will adhere to the water droplets, not the cake, causing it to peel or slide off as it sets, resulting in a dull, uneven finish.
The professional hack is deceptively simple but crucial. Just before you pour, you must eliminate this layer of condensation. Run your clean, dry palm gently but swiftly over the entire surface and sides of the frozen entremet. This action whisks away the ice crystals without transferring enough heat to melt the mousse. You are ensuring the glaze makes direct contact with the cake’s surface, creating a powerful bond that sets into a brilliant, stable shine. This isn’t just a tip; it’s a non-negotiable step in surface preparation.
How to Use a Hand Blender Without Creating Foam?
The second saboteur of a glass-like shine is air. A perfect mirror glaze is a flawless, bubble-free emulsion. Most amateur mistakes happen during the blending process, where an improperly used hand blender acts like a foam machine, whipping thousands of micro-bubbles into the mixture. These bubbles rise to the surface as the glaze sets, creating a pitted, porous texture that utterly destroys the reflective quality. The goal is not to remove bubbles later, but to prevent their formation from the start.
This is achieved by understanding fluid dynamics. A blender plunged straight down at high speed creates a vortex, a whirlpool that aggressively sucks air from the surface down into the mixture. To avoid this, you must create a shear flow instead of a vortex. This involves tilting the blender and the container, creating a current that mixes the ingredients without breaking the surface tension and incorporating air. The technique is precise and methodical, transforming the blender from an enemy into a tool of perfection.
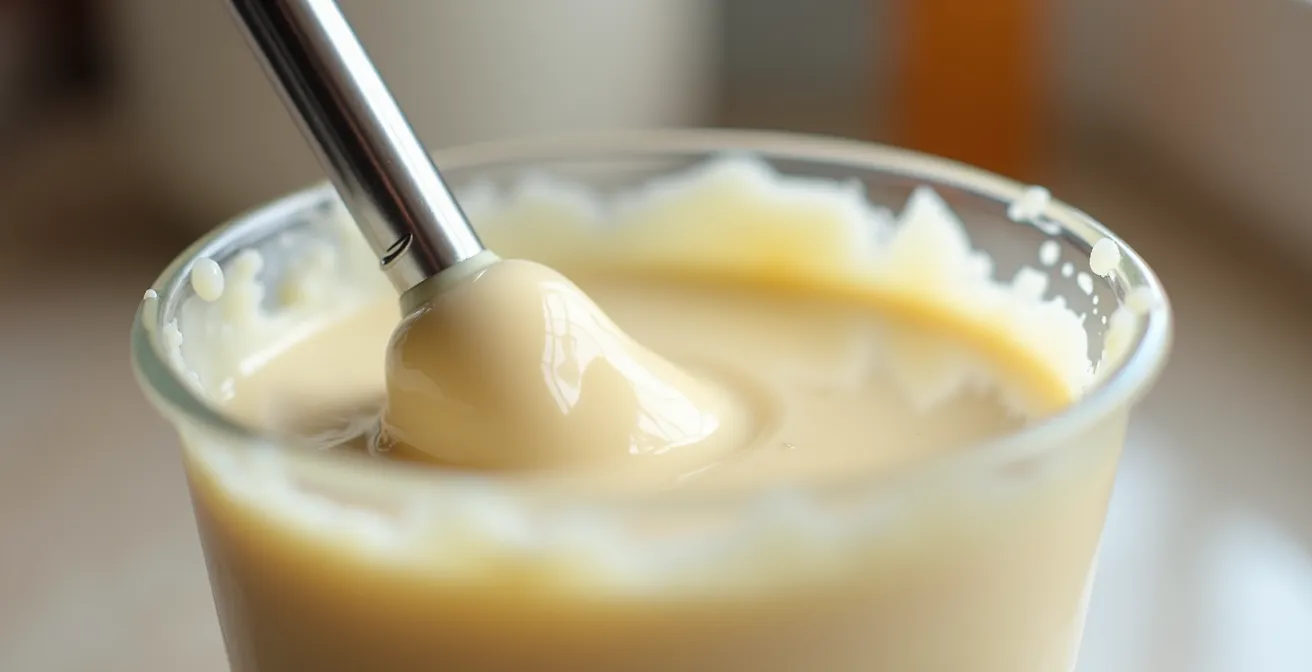
As the illustration demonstrates, the angle is everything. By keeping the blender head submerged and angled, you create a smooth, laminar flow that ensures a perfect emulsion without the disastrous side effect of aeration. Even with perfect technique, a final strain through a fine-mesh sieve is an essential quality control step to catch any stray micro-bubbles that may have formed.
Your Action Plan: The 4-Step Bubble Prevention Technique
- Submerge the blender head fully in the mixture, tilting the beaker and blender to a 45-degree angle against the container side before turning it on.
- Blend at a low speed initially to create a slow, controlled flow and prevent a vortex from forming.
- Maintain the 45-degree angle throughout blending to continuously create shear flow instead of a whirlpool.
- After blending, always strain the mixture through a fine sieve as a final guarantee against any remaining micro-bubbles.
Gold vs Silver Gelatin: Which Elasticity prevents Cracking?
The structural integrity of your mirror glaze—its ability to hug sharp corners without cracking and hold a brilliant shine—is determined by your choice of gelatin. Not all gelatin is created equal. The key metric is “Bloom,” a measure of the gelatin’s gelling strength. However, a finishing specialist thinks beyond simple strength; we think in terms of elasticity and durability. The wrong gelatin will result in a glaze that is too soft and droops, or too brittle and cracks upon setting or transport.
The science behind this lies in the gelatin’s “storage modulus,” which is a measure of its ability to store elastic energy. A higher bloom strength corresponds to a higher storage modulus, creating a more robust and resilient gel network. In fact, scientific research shows the storage modulus increases significantly from lower to higher bloom strengths, confirming that high-bloom gelatin creates a physically tougher glaze. For entremets with sharp, modern edges, a high-elasticity gelatin like Gold is essential to prevent the glaze from pulling away and cracking as it sets.
The following table, based on data from pastry supply experts, breaks down the practical applications of different gelatin grades. While Silver can work for softer, domed shapes, Gold is the professional’s choice for crisp, transport-resistant results. This choice directly impacts the final perfection of your finish.
| Gelatin Type | Bloom Strength | Best Use | Elasticity Level |
|---|---|---|---|
| Silver | 160 Bloom | Softer glazes, dome shapes | Moderate – more delicate |
| Gold | 200-220 Bloom | Sharp edges, transport-resistant | High – crack resistant |
| Platinum | 230+ Bloom | Maximum clarity, professional use | Very high – most durable |
The Temperature Mistake That Causes Glaze to Slide Off
Of all the variables, temperature is the one most often cited, and most often misunderstood. Many home bakers believe that a single “magic number” on a thermometer is the key. My own journey taught me the harsh reality when I poured a glaze too warm; the colors bled, it slid right off the sides, and I was left with a disaster. That failure taught me that the biggest difference between a beautiful creation and a sad puddle is mastering temperature. Once I stuck to 35°C (90ºF) and kept my cake frozen solid, everything changed. But even the thermometer doesn’t tell the whole story.
The number is a guide, but the true indicator of readiness is viscosity—the glaze’s thickness and flow. A glaze that is too hot will be thin like water. It will fail to cling to the cake, resulting in a transparent, patchy coat that pools at the bottom. A glaze that is too cold will be thick like pudding. It will set on contact, creating a thick, clumpy, and rubbery layer that refuses to self-level, leaving spatula marks and an opaque finish. The perfect glaze has the consistency of a thin custard, able to coat the cake in a single, even, self-leveling sheet.
Because every batch of chocolate and every kitchen’s humidity is different, you cannot trust the thermometer alone. You must trust your senses. This is where a classic professional technique comes into play, as described by experts:
While the thermometer says 35°C, every batch of glaze behaves slightly differently depending on the chocolate brand and ambient humidity. The Hack: Perform a ‘spoon test.’ Dip a metal spoon into the glaze and coat the back. Run your finger through it. The line should hold clearly without dripping immediately. If it runs like water, it’s too hot. If it sets into a rubbery gel instantly, it’s too cold. Trust viscosity as much as temperature.
– Professional Pastry Chef, Pastry Crafted Professional Techniques
When to Stop Pouring: Saving Glaze for the Sides
The final finish of your glaze is determined in the few seconds of the pour. A hesitant or poorly executed pour creates ripples, bare spots, and an uneven thickness that ruins the reflective surface. Before you even think about pouring, however, you must consider the canvas. As one professional baker notes, the foundation is everything: “The cleaner and smoother your sides are, the better your mirror glaze will look… Any imperfections will most definitely show through… The glaze will tell all when it comes to what’s underneath it.” A perfect glaze cannot hide a flawed foundation.
Once your cake is perfectly smooth and frozen, the pouring technique itself must be confident and precise. The goal is to cover the cake in a single, continuous motion, allowing gravity and the glaze’s own momentum to do the work. Over-pouring wastes expensive glaze, while under-pouring leaves you scrambling to patch bare spots with a spatula, which inevitably mars the finish. The secret is to watch for a specific visual cue: the “curtain effect.”
This effect is the moment the glaze flows over the top edge and begins to cascade down the sides in a uniform sheet. Knowing when to stop pouring—just as the curtain is closing—is a skill that separates amateurs from professionals. It ensures complete coverage without creating an overly thick layer at the base.
Follow this professional sequence for a flawless application:
- Start with a single, confident pour directly in the center of the cake.
- Continue pouring in the same spot, allowing the glaze to spread naturally to the edges.
- Watch for the “curtain effect”—the moment the glaze flows evenly down all sides.
- Stop pouring when the sides are about 80% covered; the momentum of the existing glaze will be enough to cover the remaining gaps.
- If any small bare spots remain, use the drips on the tray and an offset spatula to gently guide glaze toward them, but never touch the already glazed surface.
Why Fat Kills Egg White Foam Instantly?
To understand one of the most insidious threats to a mirror glaze, we must first look at a classic pastry principle: why a single drop of fat or egg yolk will instantly kill a developing egg white foam. The answer is molecular interference. Egg whites create foam because their proteins (like albumin) unfold and trap air bubbles, creating a stable, airy structure. Fat molecules, however, are hydrophobic and are powerfully attracted to the proteins, competing for space at the surface of the air bubbles. They disrupt the stable protein network, causing the bubbles to collapse instantly.
While a standard mirror glaze does not contain egg whites, the exact same principle of molecular interference applies and is just as destructive. Your glaze is a delicate emulsion of water, sugar, and fat (from chocolate and condensed milk), stabilized by gelatin. Its flawless, continuous surface is what creates the shine. Any foreign fat—from a greasy bowl, a fingerprint on the frozen cake, or an improperly cleaned spatula—will disrupt this emulsion on a microscopic level.
Just as it ruins an egg white foam, a trace of unwanted fat will create “holes” or spots of weakness in the gelatin network of your glaze. These spots will not set properly, will have a different texture, and will not reflect light uniformly. This results in dull patches, streaks, or an “orange peel” effect on the final surface. Therefore, the rule of absolute cleanliness is paramount. Every tool, surface, and hand that comes into contact with your glaze or cake must be scrupulously clean and free of any fat or grease. This is not a suggestion for good hygiene; it is a chemical necessity for a perfect molecular structure.
Why Edible Ink is Made of Sugar and Coloring?
The technology of edible ink, used in printers for decorating cakes, is based on a simple premise: the ink must be food-safe and stable. It’s typically a suspension of fine food-grade color pigments in a liquid base of water, glycerin, and preservatives. The core principle is delivering concentrated color in a medium that doesn’t compromise the food it’s printed on. While you won’t be printing with ink directly on your glaze, this same principle of color concentration is absolutely critical when coloring the glaze itself.
The most common mistake when coloring a mirror glaze is using the wrong type of food coloring. The carefully balanced emulsion of your glaze is highly sensitive to added water. Using standard liquid food coloring is a recipe for disaster. Because it is not concentrated, you must add a significant amount to achieve a vibrant color, and in doing so, you throw off the delicate water-to-gelatin ratio of your glaze. This excess liquid thins the glaze, weakens its setting power, and can cause it to become watery and dull.
The professional solution is to use a highly concentrated gel or powder-based food coloring. As one expert tutorial emphasizes, this choice is non-negotiable for maintaining the glaze’s integrity:
When creating different colors of glaze, it’s super important that you use gel food coloring… Gel food coloring creates vibrant shades because it is a lot more concentrated than liquid food coloring. This also means you don’t have to use much to get the color you’re after. If you try to use liquid food coloring, you will have to use a ton to get bright colors, and this can throw off the consistency of the glaze.
– Chelsweets, Blue Mirror Glaze Cake Tutorial
By using a concentrated gel, you introduce maximum color with minimal additional liquid, preserving the perfect viscosity and structural balance you worked so hard to achieve. This ensures your color is deep and vibrant, and your shine remains immaculate.
Key Takeaways
- The perfect shine is a result of a controlled thermal shock between a -18°C cake and a 35°C glaze.
- Preventing air bubbles during blending with proper technique is more important than trying to remove them later.
- High-bloom (Gold) gelatin provides the elasticity needed to prevent cracks on sharp-edged desserts.
How Edible Printing Works and Is It Safe to Eat?
Once you have achieved a perfect, glossy finish, the next step is often decoration. A common question is whether you can apply edible printed images directly onto the mirror glaze. Edible printing involves using a standard inkjet printer with food-grade edible inks to print a design onto special edible paper (like frosting sheets or wafer paper). The process is entirely safe, as all components are FDA-approved food additives.
However, attempting to print or place an edible sheet directly onto a fresh mirror glaze is a critical error. The surface of a mirror glaze is non-porous and has a high moisture content. The edible ink would never dry and would bleed instantly, while the frosting sheet would dissolve into a soggy mess, destroying both the design and your perfect shine. The glaze’s delicate, high-moisture surface is simply not a suitable canvas for direct contact decoration.
So how do professionals achieve those stunning decorated mirror glaze cakes? They use clever workarounds that respect the glaze’s fragile nature. The most popular method is the chocolate transfer. An edible image is printed onto a special chocolate transfer sheet. This is then backed with a thin layer of melted white chocolate. Once set, this creates a solid, stable disc or shape with the design embedded in it. This finished chocolate piece can then be gently placed on top of the fully set mirror glaze, adding decoration without ever compromising the glossy surface.
An even more advanced technique that allows for direct coloring is airbrushing. Using an airbrush with edible paint allows a fine mist of color to be applied to the cake after the glaze has set. This method is ideal because it adds vibrant color and detailed designs without ever physically touching or disturbing the fragile, reflective surface you’ve worked so diligently to create.
Now that you understand the science behind each step, the path to a flawless, reflective finish is clear. Put these principles into practice and transform your pastry work from hopeful attempts into consistent, professional-quality masterpieces.