
In summary:
- Pastry shrinkage is a predictable failure of technique, primarily caused by an overdeveloped gluten network and improperly managed fat temperature.
- The key is to keep the dough cold at all stages to ensure the butter remains solid, creating flaky layers rather than a tough structure.
- Two separate, mandatory chilling periods—after mixing and after lining the pan—are non-negotiable for relaxing gluten and solidifying the structure.
- Proper blind baking with weights isn’t a suggestion; it’s a required step to physically support the shell as the fat melts.
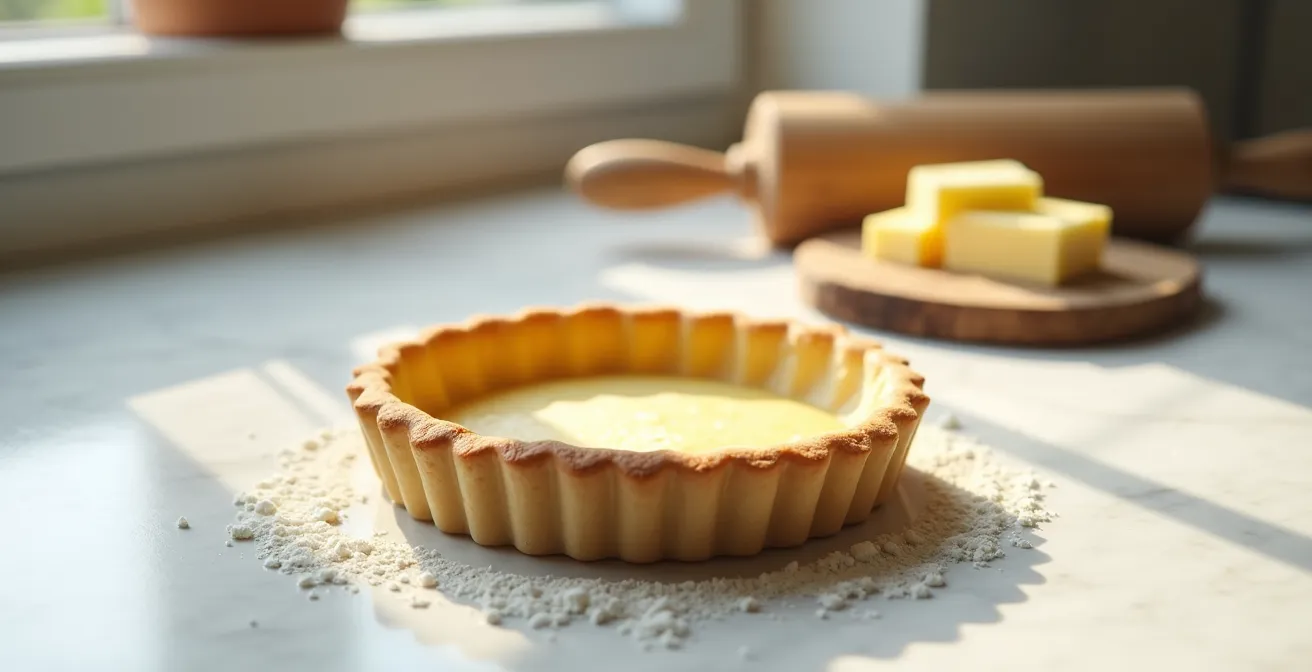
There is no greater disappointment for a baker than pulling a perfectly golden tart shell from the oven, only to see its once-proud sides slumped into a shrunken, pathetic mess. You followed the recipe, you used good ingredients, yet the result is a failure. Many will offer simple advice like “chill the dough” or “use pie weights,” treating the problem as a matter of luck. This is incorrect. A perfect tart shell is not a happy accident; it is an engineering success.
The foundation of a flawless tart rests on the unforgiving science of two elements: gluten and fat. Shrinkage is the direct, predictable consequence of mismanaging their interaction. It’s the elastic recoil of a stressed gluten network and the structural collapse of melted fat. To prevent it, you must stop thinking like a cook and start thinking like a technician, controlling temperature and dough structure with absolute precision at every step.
This guide abandons vague tips in favor of strict technical directives. We will dissect the primary causes of failure, from the initial mix to the final bake, providing the mechanical and chemical understanding needed to construct a tart shell with unwavering structural integrity. By mastering these principles, you will eliminate shrinkage from your baking repertoire permanently.
This article details the critical technical checkpoints for building a stable tart shell. The following sections break down each non-negotiable step, from ingredient science to final baking strategy, ensuring you understand the ‘why’ behind every action.
Summary: Why Your Tart Shell Shrinks: The Unforgiving Science and How to Master It
- Why Over-Mixing Flour Creates a Tough Crust?
- How to Smear Dough to Remove Butter Lumps?
- Silicone Mat vs Floured Counter: Which Keeps Dough Cool?
- The Baking Mistake That Leaves the Tart Center Raw
- When to Chill the Dough: Before or After Rolling?
- Why Using the Wrong Cocoa Can Stop Your Cake from Rising?
- Cake Flour vs All-Purpose: Which Makes a Tender Shell?
- How to Time Your Molten Cake so the Center Stays Liquid?
Why Over-Mixing Flour Creates a Tough Crust?
The primary culprit behind pastry shrinkage is gluten. When flour is hydrated, two proteins—glutenin and gliadin—link together to form a highly elastic web known as the gluten network. In bread, this network is desirable; it traps gases and gives the loaf its chewy structure. In pastry, it is your enemy. The more you mix, knead, or work the dough, the stronger and more extensive this network becomes. This elastic web has a powerful “memory” and will constantly try to pull back to its smaller, un-stretched state.
This microscopic image shows the delicate matrix of flour and fat. When you over-mix, you destroy this separation and create long, rubbery gluten strands instead. These strands are what cause the dough to fight back when you roll it and, most critically, what make it shrink dramatically in the oven’s heat. Pastry science confirms that an overworked gluten network can cause 15-20% more shrinkage. The rule is simple: mix only until the dough just comes together. You must still be able to see distinct, pea-sized pieces of butter.
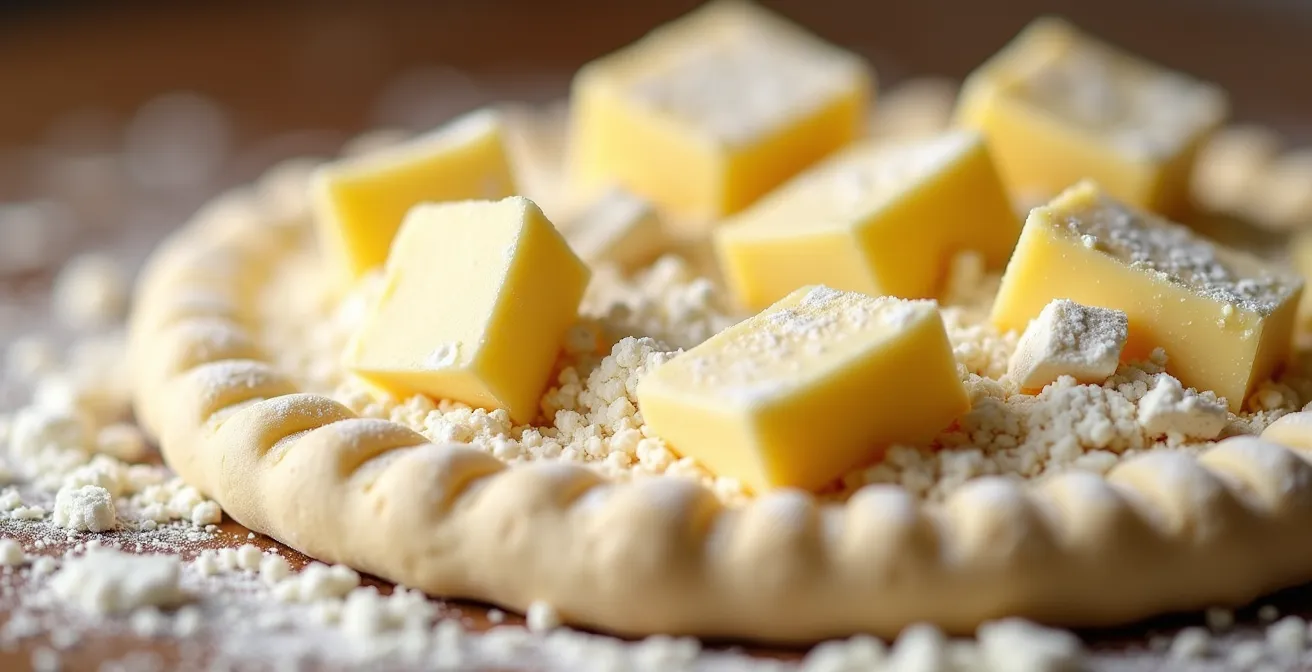
Look for this texture. The visible pockets of butter are not a mistake; they are essential. When baked, these butter pockets will melt and release steam, creating the delicate, flaky layers of a perfect crust. An over-mixed, homogenous dough has no such pockets, resulting in a tough, cracker-like texture that is prone to shrinking. Your goal is not to create a smooth dough, but a fragile agglomeration of flour-coated fat.
How to Smear Dough to Remove Butter Lumps?
While visible pieces of butter are essential, large, un-incorporated lumps are a structural liability. They create weak spots and can melt out during baking, leaving a hole. The challenge is to flatten the butter into thin sheets without overworking the dough and developing gluten. The classic French technique for this is called fraisage. It is a non-negotiable skill for the serious baker.
After your dough has just come together, you turn it out onto a lightly floured surface. Using the heel of your hand, you take a small portion of the dough and smear it forward across the counter in a single, decisive motion. This action flattens the large butter pieces into thin layers without the repetitive friction of mixing. You then scrape up the smeared dough with a bench scraper, gather it, and repeat the process just once or twice more with the entire mass. This ensures the butter is laminated throughout the dough, ready to create flaky layers.
Case Study: The Smitten Kitchen “Unshrinkable” Shell
The popular food blog Smitten Kitchen famously chronicled its battle against pastry shrinkage, a struggle familiar to countless home bakers. The breakthrough came upon adopting the professional fraisage technique. By smearing the dough to properly incorporate the butter without developing gluten, the result was a tart shell that finally lived up to its promise, one that the author declared “shrinks no more.” This serves as definitive proof that mastering this specific physical technique is the solution to what many perceive as an unsolvable problem.
This technique is superior to other methods for creating a tender, flaky, and stable tart shell. The following table contrasts fraisage with more common approaches, highlighting its low risk of shrinkage.
| Method | Texture Result | Shrinkage Risk | Best For |
|---|---|---|---|
| Fraisage (smearing) | Tender, flaky | Low | Professional tart shells |
| Food processor | Sandy, uniform | Medium | Pâte sablée |
| Pastry blender | Rustic, varied | Medium-Low | American pie crust |
| Hand mixing | Variable | High if overworked | Small batches |
Silicone Mat vs Floured Counter: Which Keeps Dough Cool?
The second law of pastry is that fat must remain solid until it hits the oven. The flakiness of your crust depends on cold, solid pieces of butter creating steam pockets during baking. As soon as the butter begins to soften and melt into the flour, you are no longer making a flaky pastry; you are making a greasy, tough cookie. The surface you roll your dough on plays a critical role in this temperature management.
A traditional wooden or laminate counter absorbs ambient warmth and transfers it to your dough through friction. A silicone mat offers a non-stick surface but provides zero thermal benefit. For a perfectionist, the only acceptable surface is one that actively works to keep the dough cold. A marble or granite slab is the professional standard. These materials act as a heat sink, actively pulling warmth out of the dough as you work. This gives you a wider window of time to roll and shape the dough before the fat’s integrity is compromised.
If a marble slab is not available, you must employ other aggressive cooling techniques. Your objective is to minimize heat transfer at all costs. Consider these options:
- Use a marble or granite rolling pin that has been chilled in the freezer.
- Work in the coolest room of your house, ideally below 70°F (21°C).
- If the dough becomes soft or greasy to the touch at any point, stop immediately and return it to the refrigerator for 15-20 minutes. Do not fight it.
The importance of this principle cannot be overstated, as pastry experts from MasterClass confirm.
Refrigerating will help the fat in the dough re-solidify and allow the gluten in the dough relax, leading to a flakier pie dough that doesn’t shrink.
– MasterClass Instructors, MasterClass Baking Guide
The Baking Mistake That Leaves the Tart Center Raw
A shrunken crust is often accompanied by another failure: a pale, undercooked, or “soggy bottom.” This occurs when the baker is afraid to bake the shell thoroughly before adding the filling. The technique to prevent this is called blind baking, and it must be executed with precision. Its purpose is twofold: to set the structure of the shell before it can slump, and to cook the bottom of the crust to a golden, waterproof finish.
The most common mistake is insufficient support and inadequate baking time. To prevent the sides from slumping and the bottom from puffing up, the shell must be filled with pie weights. You must line the chilled shell with parchment paper or foil, ensuring it is pressed firmly into the corners, and then fill it to the brim with ceramic or metal pie weights. Dried beans or rice are a poor substitute as they are not dense enough to provide adequate pressure against the sides. The weights act as a physical buttress, holding the walls in place as the fat begins to melt.
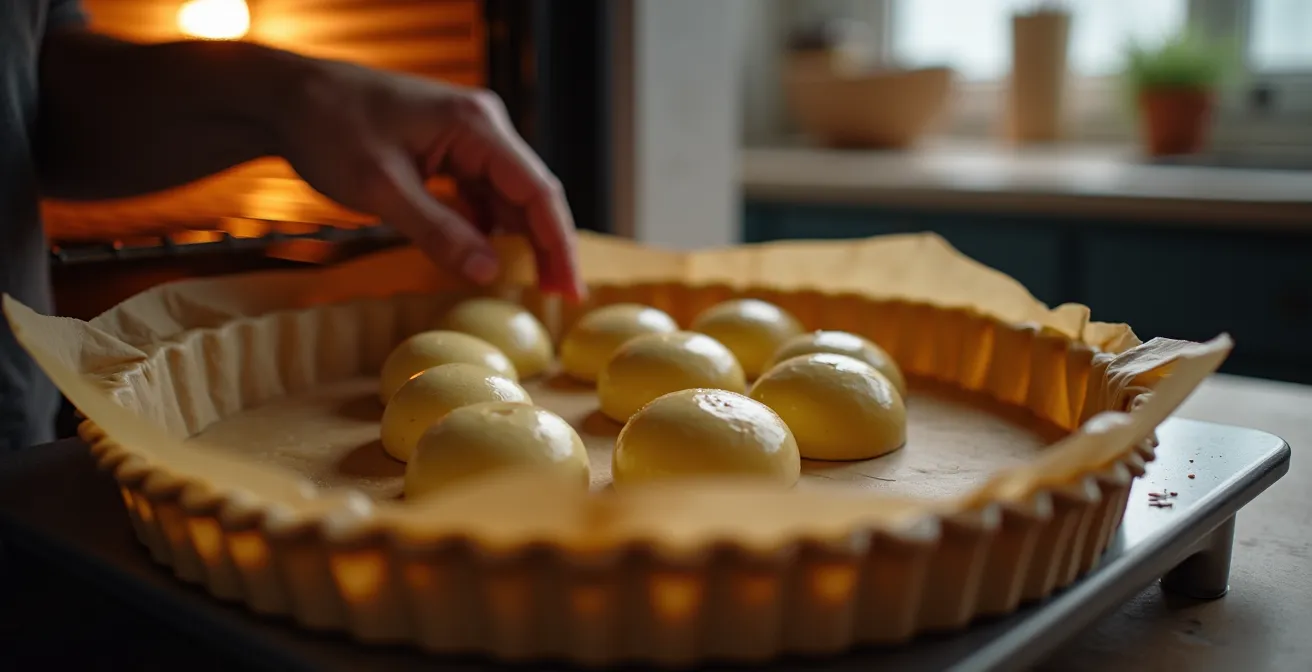
Professionals employ a two-stage baking process. First, the shell is baked with the weights until the edges are lightly golden and the structure is set. Then, the parchment and weights are carefully removed, and the shell is returned to the oven to allow the bottom to cook through and take on color. Skipping this second stage is what leads to a raw center. The ideal method requires baking at around 350°F (175°C) for up to 60 minutes with weights, followed by another 10-15 minutes without, until the entire shell is uniformly golden brown.
When to Chill the Dough: Before or After Rolling?
The answer is not “before or after.” It is “before, and after.” A mandatory double-chill is the structural engineer’s approach to a stable tart shell. Each chilling period serves a distinct and equally critical purpose. Skipping either one is a direct invitation to failure.
The first chill happens immediately after mixing the dough. This rest period, a minimum of one hour in the refrigerator, is not for cooling alone. Its primary purpose is to relax the gluten network. As established, mixing creates tension in the dough. This resting period allows the elastic gluten strands to relax, making the dough easier to roll without fighting back and drastically reducing its tendency to shrink later. It also allows the flour to fully hydrate.
The second chill is performed after the dough has been rolled out and fitted into the tart pan. This rest, for at least 30 minutes in the refrigerator or 15-20 minutes in the freezer, is for re-solidifying the fat. No matter how carefully you worked, the process of rolling and shaping will have softened the butter. This second chill ensures the butter is rock-solid when it enters the hot oven. This thermal shock creates the rapid burst of steam needed for a flaky texture and helps set the shell’s shape before the fat can simply melt and cause the sides to slump. The shell must be cold and firm to the touch before baking; there is no room for compromise on this point.
The following timeline details the non-negotiable double-chill method.
| Chilling Stage | Duration | Purpose | Temperature |
|---|---|---|---|
| After mixing | 1-2 hours minimum | Relax gluten, hydrate flour | Refrigerator (35-38°F / 2-3°C) |
| After shaping in pan | 30 min to overnight | Re-solidify fats, prevent slumping | Freezer (15-20 min) or Fridge |
| Emergency quick chill | 15-20 minutes | Last-minute firming | Freezer (0°F / -18°C) |
Why Using the Wrong Cocoa Can Stop Your Cake from Rising?
This obsession with technical precision is not confined to pastry crusts. It is a universal law in baking, where slight variations in ingredient chemistry can lead to catastrophic failure. A prime example is the interaction between cocoa powder and chemical leaveners, a frequent point of failure in chocolate cakes.
There are two primary types of unsweetened cocoa powder: natural and Dutch-processed. Natural cocoa powder is acidic. Dutch-processed cocoa powder has been treated with an alkali to neutralize its acidity, resulting in a darker color and milder flavor. This difference in pH is critically important when your recipe relies on baking soda for leavening. Baking soda (sodium bicarbonate) is a base. It requires an acid to react with to produce the carbon dioxide gas that makes a cake rise.
If your recipe calls for baking soda and natural cocoa powder, the cocoa’s acidity provides the necessary reaction. If you substitute it with neutral Dutch-processed cocoa, there is no acid for the baking soda to react with. The result? A flat, dense, and soapy-tasting cake. Conversely, a recipe designed for Dutch-processed cocoa will typically use baking powder, which is a complete leavening system containing both a base (baking soda) and an acid. Using acidic natural cocoa in such a recipe can create too much acid, potentially affecting the flavor and texture. This demonstrates that ingredient selection is not about preference; it is about chemical compatibility.
Cake Flour vs All-Purpose: Which Makes a Tender Shell?
Just as controlling gluten development during mixing is crucial, so is choosing a flour with the correct gluten potential from the start. The type of flour you use sets the upper limit for how much gluten can possibly be formed. For a tender, melt-in-your-mouth tart shell, a lower protein content is not just preferable; it is required.
All-purpose flour, the common default, contains a protein content of around 10-12%. This is a versatile middle ground, but it is too high for a truly delicate pastry. It creates a sturdier, chewier crumb. For maximum tenderness, you must use a flour with less protein. Pastry flour, with a protein content of 8-9%, is the professional’s choice. It has just enough gluten to provide structure but not enough to create toughness. Cake flour, with an even lower protein content (7-8%), can also be used, often resulting in an almost cookie-like, sandy texture known as pâte sablée.
As professional bakers know, the difference between pastry flour at 8-9% protein vs. all-purpose at 10-12% is the difference between a good crust and a perfect one. If pastry flour is unavailable, you cannot simply substitute all-purpose flour and expect the same result. You must modify it to lower its protein content. The following checklist provides the standard formula for creating a reliable pastry flour substitute.
Your Action Plan: DIY Pastry Flour Formula
- Measure: Start with exactly 1 cup (120g) of all-purpose flour, leveled precisely.
- Remove: Remove 2 level tablespoons (about 15g) of the all-purpose flour from the cup.
- Substitute: Add 2 level tablespoons (about 15g) of cornstarch to the flour.
- Incorporate: Sift the flour and cornstarch mixture together at least three times to ensure the cornstarch is perfectly distributed.
- Use: This mixture now approximates the protein content of pastry flour and can be used immediately in your recipe.
Key Takeaways
- Control Gluten: The primary cause of shrinkage is an overworked gluten network. Mix minimally and choose a low-protein flour like pastry flour.
- Manage Temperature: The flakiness of your crust depends on solid fat. Use a cold work surface and employ a mandatory double-chill process to keep the butter solid until baking.
- Bake with Force: Blind baking with pie weights is not optional. It provides the physical support necessary to prevent the sides from slumping as the structure sets in the oven.
How to Time Your Molten Cake so the Center Stays Liquid?
The ultimate test of a baker’s precision is not in complex recipes, but in simple ones where timing is everything. The molten chocolate lava cake is a perfect example. Its success hinges entirely on a window of time that can be as short as 30-60 seconds. This is the final frontier of baking precision: mastering your oven and your internal clock.
A molten cake’s liquid center is not a special filling; it is simply under-baked cake batter. The entire dessert is a race against time. The goal is to apply high, intense heat to rapidly cook the outside of the cake, setting its structure, while leaving the very center just warm enough to be a luscious, flowing “lava.” This requires a preheated oven, typically at a high temperature like 400-425°F (200-220°C).
There is no magic number for timing. It depends entirely on your specific oven, the material of your ramekins (dark metal cooks faster than light ceramic), and the starting temperature of your batter. The only way to master it is through controlled observation. The visual cue is key: the edges of the cake should look set and matte, while the center, about the size of a quarter, should still look soft, wet, and slightly jiggly. Pulling the cakes out 1 minute too early results in a collapsed mess. One minute too late, and you have a perfectly fine, but ultimately disappointing, chocolate cupcake. This is where a baker’s intuition, honed by rigorous practice and attention to detail, becomes the most important tool.
Your journey from frustrated baker to pastry technician is complete. Stop hoping for the best and start implementing these non-negotiable principles. Take absolute control of your ingredients, temperature, and timing to engineer flawless results every time.
Frequently asked questions on Why Your Tart Shell Shrinks in the Oven and How to Prevent It?
Why does my chilled dough crack when rolling?
If your dough cracks upon rolling, it is either too cold or too dry. If it’s too cold, let it sit at room temperature for 5-10 minutes to become more pliable; it will make the dough infinitely easier to roll. If it remains crumbly, the issue is likely a fundamental recipe flaw where the dough lacks sufficient hydration.
Can I freeze the dough instead of refrigerating?
Yes, freezing is a powerful technique. A frozen dough shell is even less likely to shrink and slump during the initial phase of baking because the fat is in a completely solid state. Even an hour or two in the freezer before baking provides a significant structural advantage over simple refrigeration.
How do I know when the dough has chilled enough?
There should be no ambiguity. Before it goes into the oven, the shaped tart shell must feel completely firm and cold. When you touch it, it should feel rock-solid, not pliable or soft. This ensures the fat is fully solidified and ready for the thermal shock of the hot oven.